Wrap any head onto any scan — and take its textures with it.
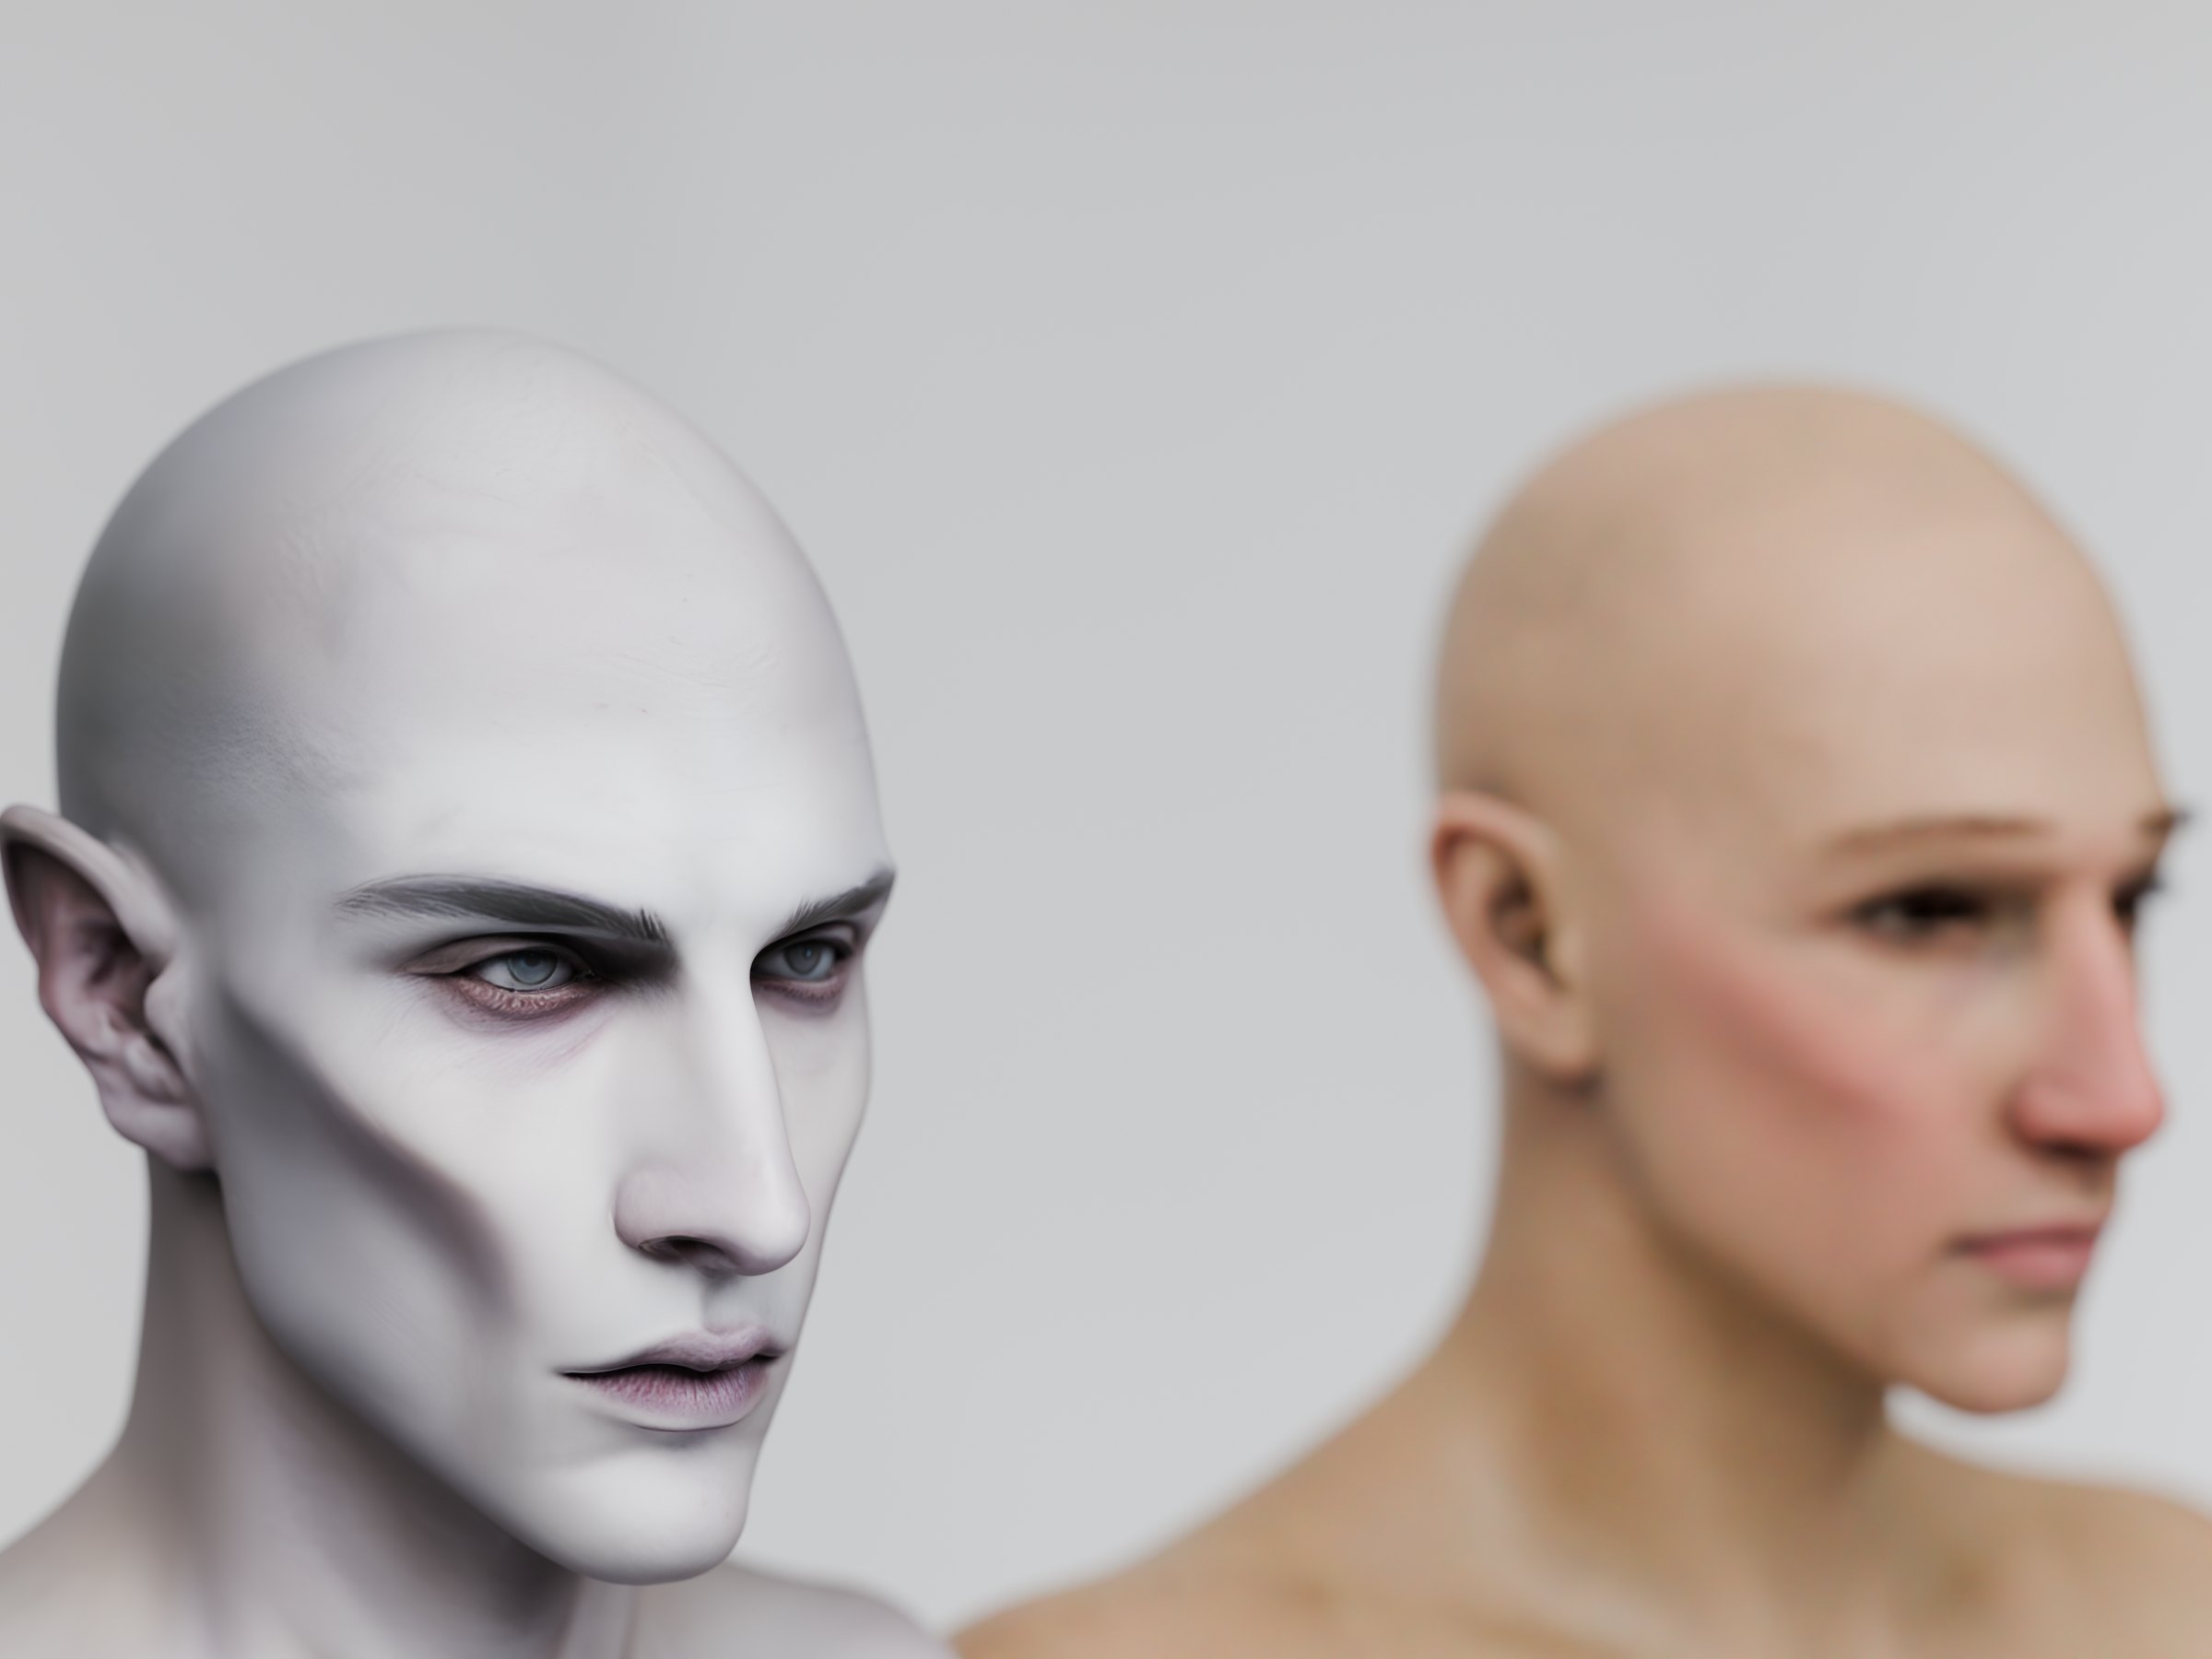
WrapZar is a professional head-wrapping toolkit for Blender. Give it a clean basemesh and a scanned head, place a handful of matching landmarks, and the add-on conforms your template onto the target while keeping every vertex, face, UV layout and vertex group exactly where you authored them. When the wrap is done, the same panel moves the scan's textures onto your template's UV space.
01 — Compatibility
Runs where Blender 5.1 runs.
Everything the add-on needs for each platform ships inside the install package. There is nothing extra to download and no separate installer.
Installation
- In Blender, open Edit → Preferences → Extensions.
- Click the arrow menu at the top right and choose Install from Disk….
- Select the WrapZar
.zipyou downloaded. - Open a 3D Viewport, press N for the Sidebar, and click the WrapZar tab.
Before you start — apply every modifier.
Neither the template nor the target may have active modifiers. WrapZar reads the real mesh data, so any modifier that adds, removes or reshapes geometry must be applied on both objects before you run. If one is still live, the add-on warns you and names the offending object.
02 — The ten-minute tour
The panel is the workflow.
Reading the add-on top to bottom is the same as doing the job. Each section is one step.
- Engine — how the template is deformed. The default is right for a full head.
- Meshes — pick template and target, or drop in a bundled head.
- Pair Views — split the viewport, then place landmarks by clicking or drawing curves.
- Pairs / Splines — the matching points tell the wrap where the features are.
- Free Faces — mark regions (inner mouth, eye cavities) that move along but never glue to the scan.
- Run — the wrap runs in the background and can be cancelled.
- Relocate Texture — bake the scan's images into the template's UV layout and fill the gaps.
- Material Zones (collapsible, at the bottom) — a helper for imported characters that mark body regions with material slots, like figures from Daz Studio: pull the head out as its own target mesh, or turn zones into vertex groups for Free Faces.
A typical session: load a bundled template, pick the scan, Setup Pair Views, place 15–30 pairs around the eyes, nose, lips and silhouette, mark the mouth interior as free, press Run, then Relocate the scan texture onto the wrapped head.
03 — Panel reference
Every control, in order.
Every field lives in the WrapZar tab of the 3D Viewport sidebar, in the same order shown here. Most fields carry a ? icon that opens this same explanation in place.
Engine
How the template is deformed onto the scan.
| Engine | GraphWrap (default) or L-ICP. GraphWrap is the usual choice for a full head — it balances surface attraction, your pairs and shape preservation in one solve. L-ICP is the lighter pipeline; handy as a second opinion or a quick pull toward the scan. |
|---|---|
| L-ICP recipe | Paper (default) follows the full multi-stage recipe. Simple is a short alignment plus one smooth deform — use it when you only need a gentle pull. Only visible with the L-ICP engine. |
Meshes
What gets wrapped, and what it wraps onto.
| Use addon head templates | On by default — shows the two bundled-head buttons. Turn it off if you only work with your own templates. |
|---|---|
| Template Full | Appends a bundled head that already has the mouth interior and both eye cavities marked as free faces — the most common choice. |
| Template Partial | The same head with only the mouth interior marked free. |
| Template | The mesh that keeps its topology and UVs. The add-on only moves its vertices — face layout, UV seams and vertex groups are preserved. |
| Target | The scan or sculpt you are wrapping onto. It never moves and is never modified. |
| Restore Original Template | Appears after the first wrap. Puts the stored original vertices back so you can wrap again from the rest shape instead of from a deformed state. |
Quality in, quality out. The wrap can only be as good as the template and the pairs you give it. A clean, even-density head template with sensible UVs and a dozen well-placed pairs beats a heavy template with hundreds of sloppy ones.
Pair Views
A focused two-view layout for placing landmarks.
| Setup Pair Views | Splits the 3D Viewport — template alone on the left, scan alone on the right — and activates the matching draw tool. Run it from a 3D Viewport. |
|---|---|
| Exit Pair Views | Puts everything back: both meshes visible, pair marks hidden, views merged, back to the normal select tool. |
| Sync pair views | On by default — orbiting or zooming one view moves the other so both heads stay aligned. Turn it off to frame each mesh independently. |
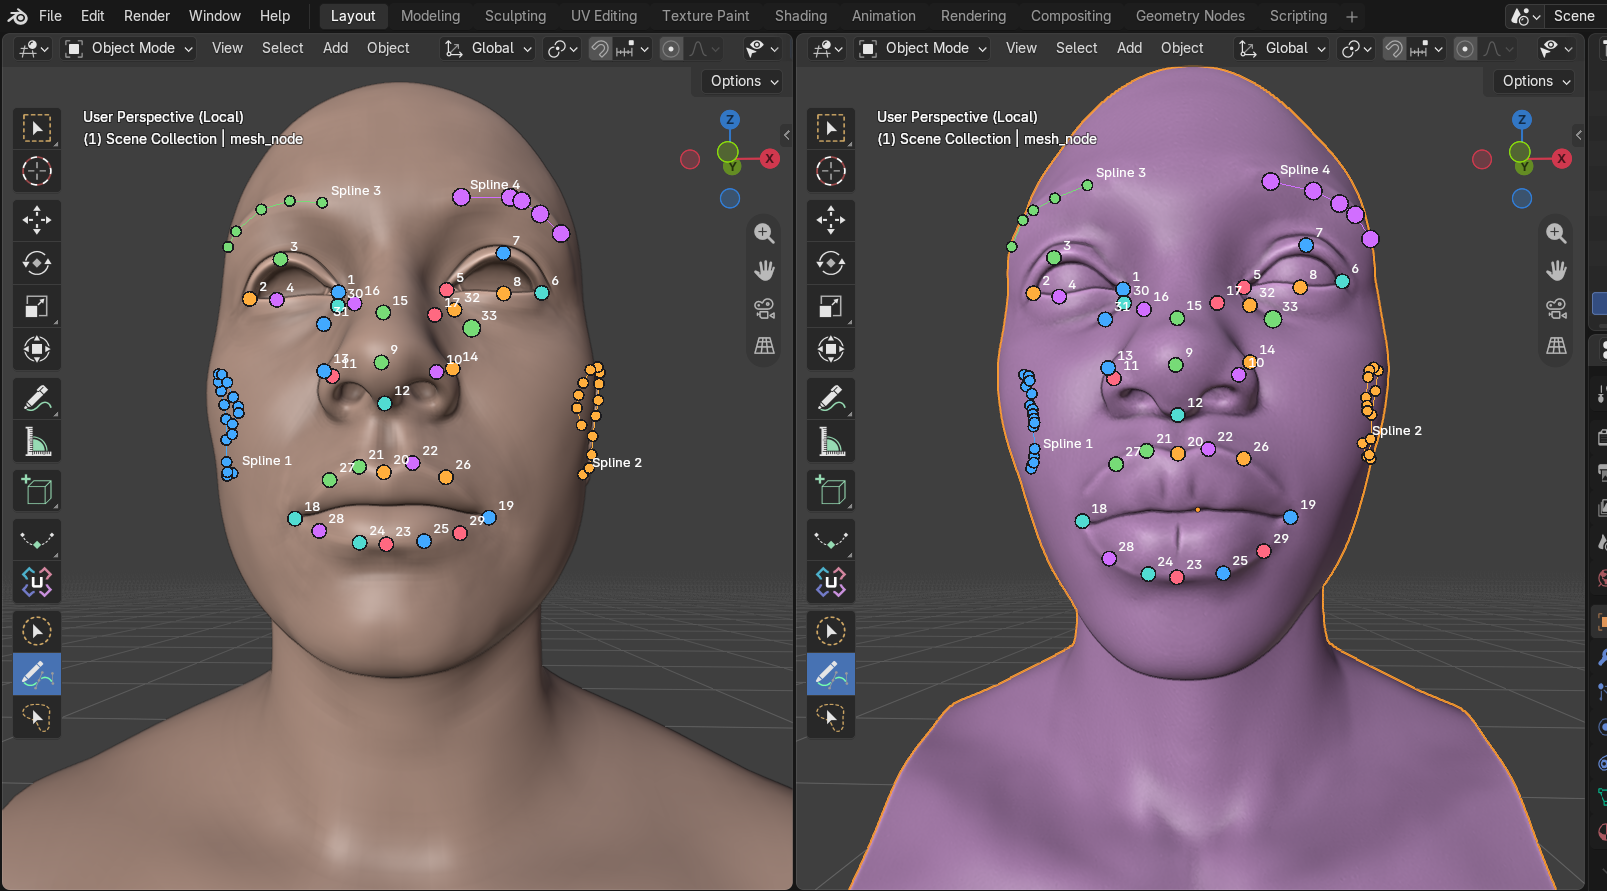
| Draw | Pairs (default) places one matching point per click pair. Splines draws matching curves that convert into many pairs at once — and reveals the curve settings below. |
Spline settings (visible when Draw = Splines)
| Sampling | Per spline (default) spreads a fixed count along the whole curve. Per segment puts a fixed count on every stretch between two control clicks. |
|---|---|
| Points / spline | 2–200, default 20. Twenty points along a brow or lip line is a good density. |
| Points / segment | 2–50, default 2. Useful when your control clicks are unevenly spaced. |
| Path | Along edges (default) is fast and follows the mesh's edges. Geodesic takes a shorter path over the surface — smoother on dense meshes. |
| Spline pair weight | Default 1.0. How strongly spline-created pairs pull the wrap. Raise it if a drawn region is ignored; lower it if the curve is only a hint. |
| Spline confidence | 0–1, default 1.0. Lower it for approximate curves so they are trusted less than your hand-placed pairs. |
| Name separator | Text between the spline name and the sample number — UpperLip becomes UpperLip_00. |
| Auto name padding | On by default — grows the number width automatically, so twenty samples are named 00–19. |
| Name padding | 1–8, default 2. Fixed digit width when Auto name padding is off. |
| Closed | Per selected spline. Turn it on for loops — a closed lip line or a belt around the head. |
Wrap settings
Visible with the default engine. These defaults match a typical face wrap — change them only when you have a reason.
| Levels | 1–8, default 3. How many times the solve gets finer. More levels follow smaller details and take longer. |
|---|---|
| ICP iterations | 1–50, default 7. How many times each level looks at the scan and then deforms. Raise it if large regions still miss the surface. |
| Optimization iterations | 1–100, default 20. How hard each step is allowed to pull. Higher values can fit closer but may wrinkle the mesh when you have few pairs. |
| Handles per vertex | 1–32, default 8. How many nearby control handles influence each vertex. Change it only if the deformation looks patchy. |
| Sampling start / end % | Defaults 10.0 → 0.1, the usual coarse-to-fine range. A smaller final value adds more handles and more detail. |
| Flexible Shape Fit | Off by default. Turn it on for creatures, caricatures and heads with parts that sit close together — it relaxes shape preservation and makes influences follow the template surface instead of straight-line distance. Leave it off for ordinary human heads. |
With the mode on, exaggerated proportions — long ears, horns, a wide-open jaw — can actually reach the scan instead of being rounded back toward the template, parts that merely pass near each other stop pulling across the gap, and every disconnected piece gets its own handles. Free faces such as the mouth interior keep their full coherence. It can run without pairs, though extreme differences still benefit from a few well-placed matches.
L-ICP settings (visible with the L-ICP engine)
| Stiffness start / end | Defaults 100 → 1. A high start keeps the face from collapsing early; a lower end lets it settle onto the scan. |
|---|---|
| Deform iterations | 1–200, default 30. The solve can stop earlier once the face sits on the scan. |
| Matching | Closest point (default) is safer while the meshes are far apart; Along normals is better for the last close fit. |
| Pair weight | Default 10.0. How strongly your placed pairs must be honored. Raise it if a pair is ignored; lower it if one pair stretches the face. |
| Surface weight | Default 1.0. How strongly the rest of the surface is pulled toward the scan. |
Pairs
Pairs are matching points — a spot on the template and the equivalent spot on the scan. They are the single biggest quality lever you control.
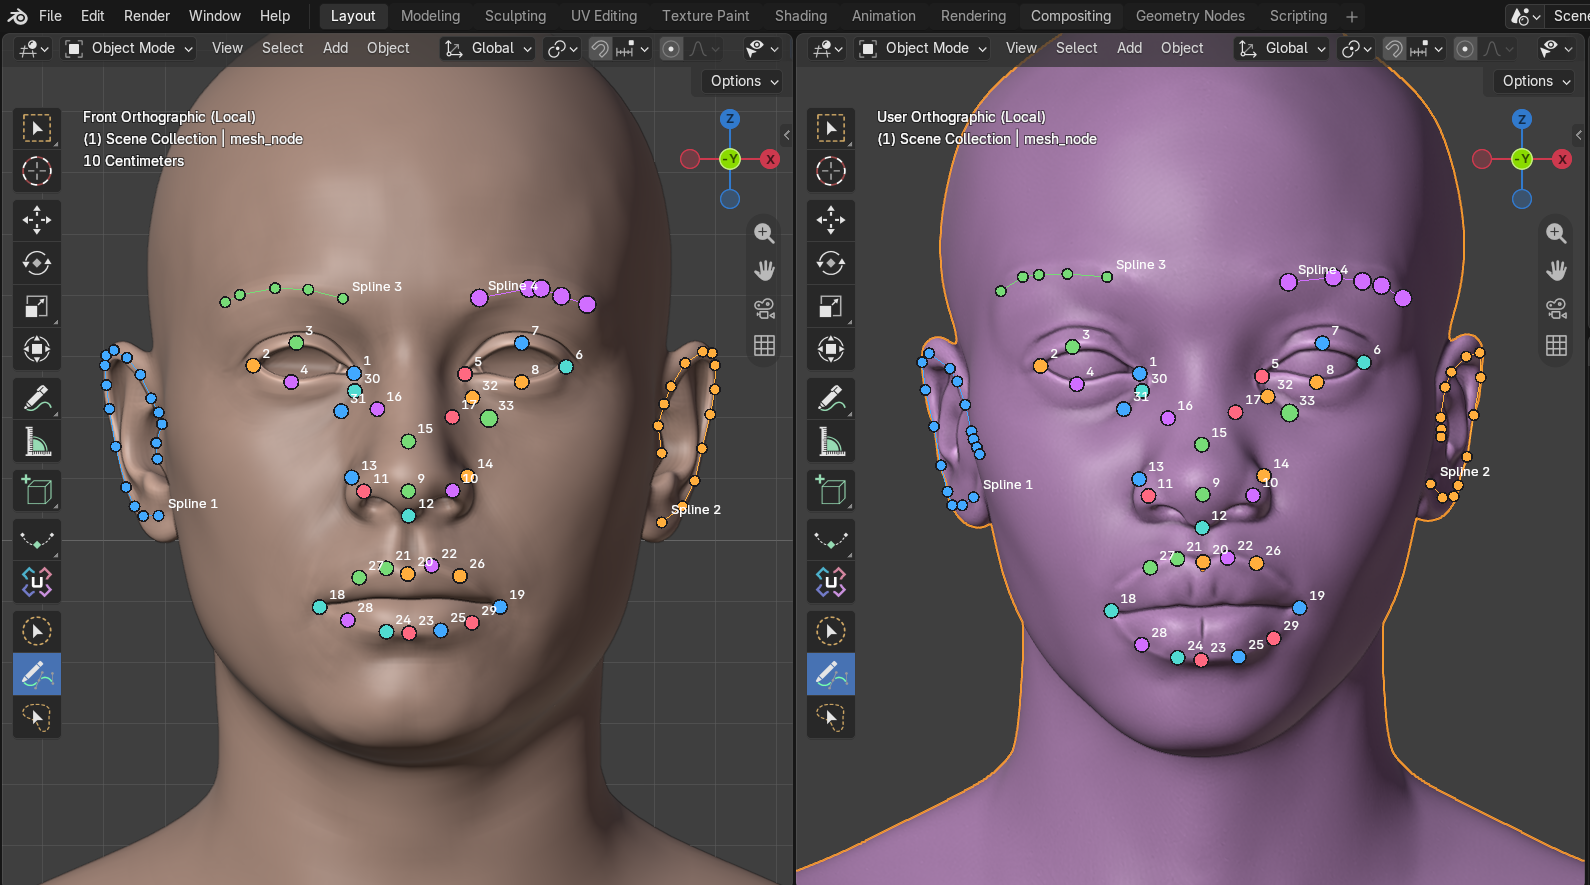
- Click the template on the left, then the matching spot on the scan on the right.
- An unpaired click shows as a red pin; a finished pair gets its own color and the same number on each mesh.
- Drag a pin to slide it along the surface. Ctrl-click a pin to delete it.
| Pair list | Each row: an enabled checkbox, an editable name, and the matched face indices. Untick a pair to keep it but exclude it from the solve. |
|---|---|
| Delete / Clear / Cancel | X deletes the selected pair, the trash clears every pair, and the cancel button drops a template pin that has not been matched yet. |
| Import / Export | Save the current pairs to reuse them on the same topology, or load a saved pair list — the meshes must still have the same face layout as when it was exported. |
Splines
A second, faster way to place the same kind of pairs. Draw a named curve on the template, then the matching curve on the scan — each curve becomes a row of evenly spaced pairs.
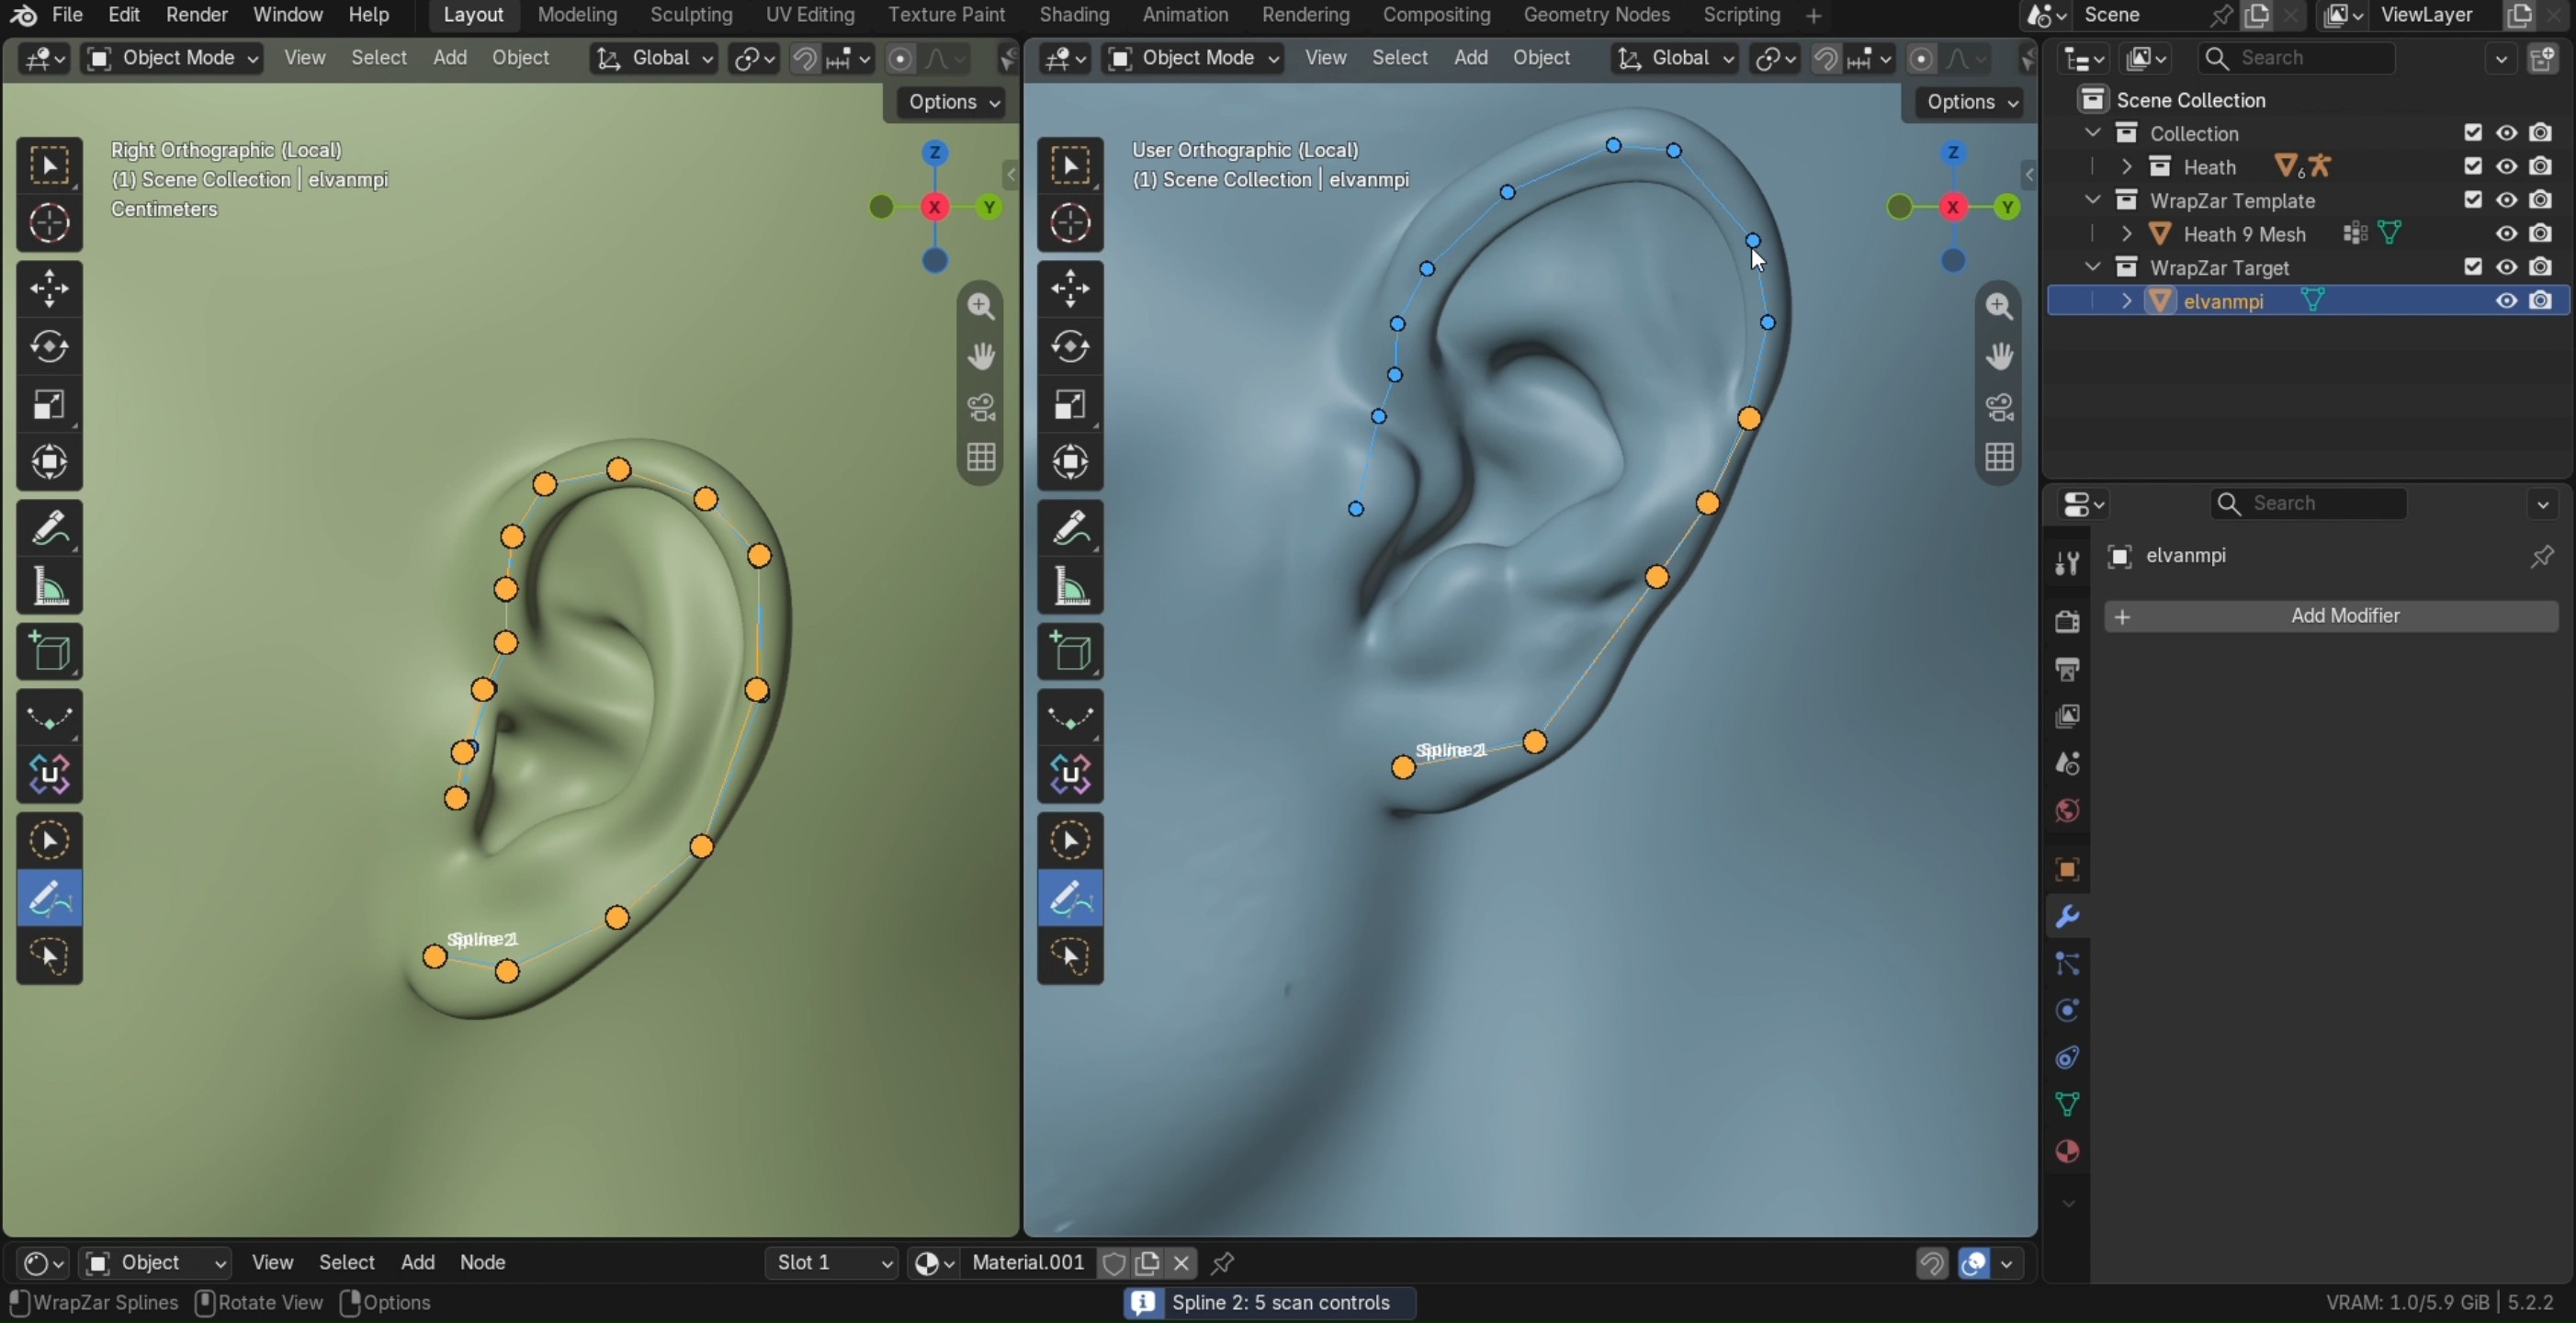
- Click to drop control points; the curve slides along the surface between them.
- Draw on the template first, then the scan. Once both sides have points, the next click on the other mesh starts a new spline automatically.
- Alt-click or New Spline also starts a new curve. Ctrl-click removes the last control on the mesh under the cursor.
- Spline names must be unique — the two sides are matched by name, not by order.
| Spline list | Each row: enabled checkbox, editable name, and template/scan control counts. |
|---|---|
| Delete / Clear / Reverse | Delete removes the selected spline and the pairs it produced; Clear removes all splines and their pairs (clicked pairs stay); Reverse flips the direction of the selected spline. |
| Sample to Pairs | Converts every complete named spline into pairs and adds them to the pair list. Running it again replaces only spline pairs — your clicked pairs are never touched. |
Free Faces
Free faces are template regions that are skipped when the wrap looks for the scan but still move with the result. Use them for the inner mouth, the eye bags, or any region that should follow the deformation instead of gluing to the surface.
| Use Selected Faces | Marks the faces you have selected in Edit Mode on the template. |
|---|---|
| Select Groups | Marks faces whose vertex-group names match the Free groups field. If the field is empty, it tries the usual mouth-socket naming used by the bundled templates. |
| Grow / Shrink / Invert / Clear | Expand or contract the region by one ring, flip the selection, or remove all free marks. |
| Free groups | Comma-separated vertex-group names from your template; wildcards work (MouthSocket*, InnerMouth,Tongue). Only used by Select Groups. |
| Free Faces tool | A viewport toolbar tool that toggles free marks by clicking template faces directly. |
Always mark the interior geometry. If your template has a mouth bag, teeth socket or eye cavity, mark it before you run — otherwise those faces try to stick to the outside of the scan and fold the wrap. The bundled templates already ship with the right regions marked.
Run
| Continue from last wrap | Off by default. Turns on a warm start from the current template shape instead of the stored rest pose — enable it only to refine a wrap you already ran, e.g. after adding more pairs. |
|---|---|
| Run Wrap | Starts the wrap in the background. Blender stays responsive; the panel shows progress and status. |
| Cancel | Requests a stop. The current solve step finishes first, then the job halts. |
After a successful run the template's vertices sit on the scan. Topology, UVs and vertex groups are untouched — the result is still the same mesh, only moved.
Relocate Texture
Once the wrap is done, Relocate Texture bakes images from the scan onto the wrapped template's UV layout. Queue any images already loaded in the scene and press Relocate — each source produces two new images: the raw transfer and the filled result.
The target head and its source texture, as stored in the target's own UV layout.
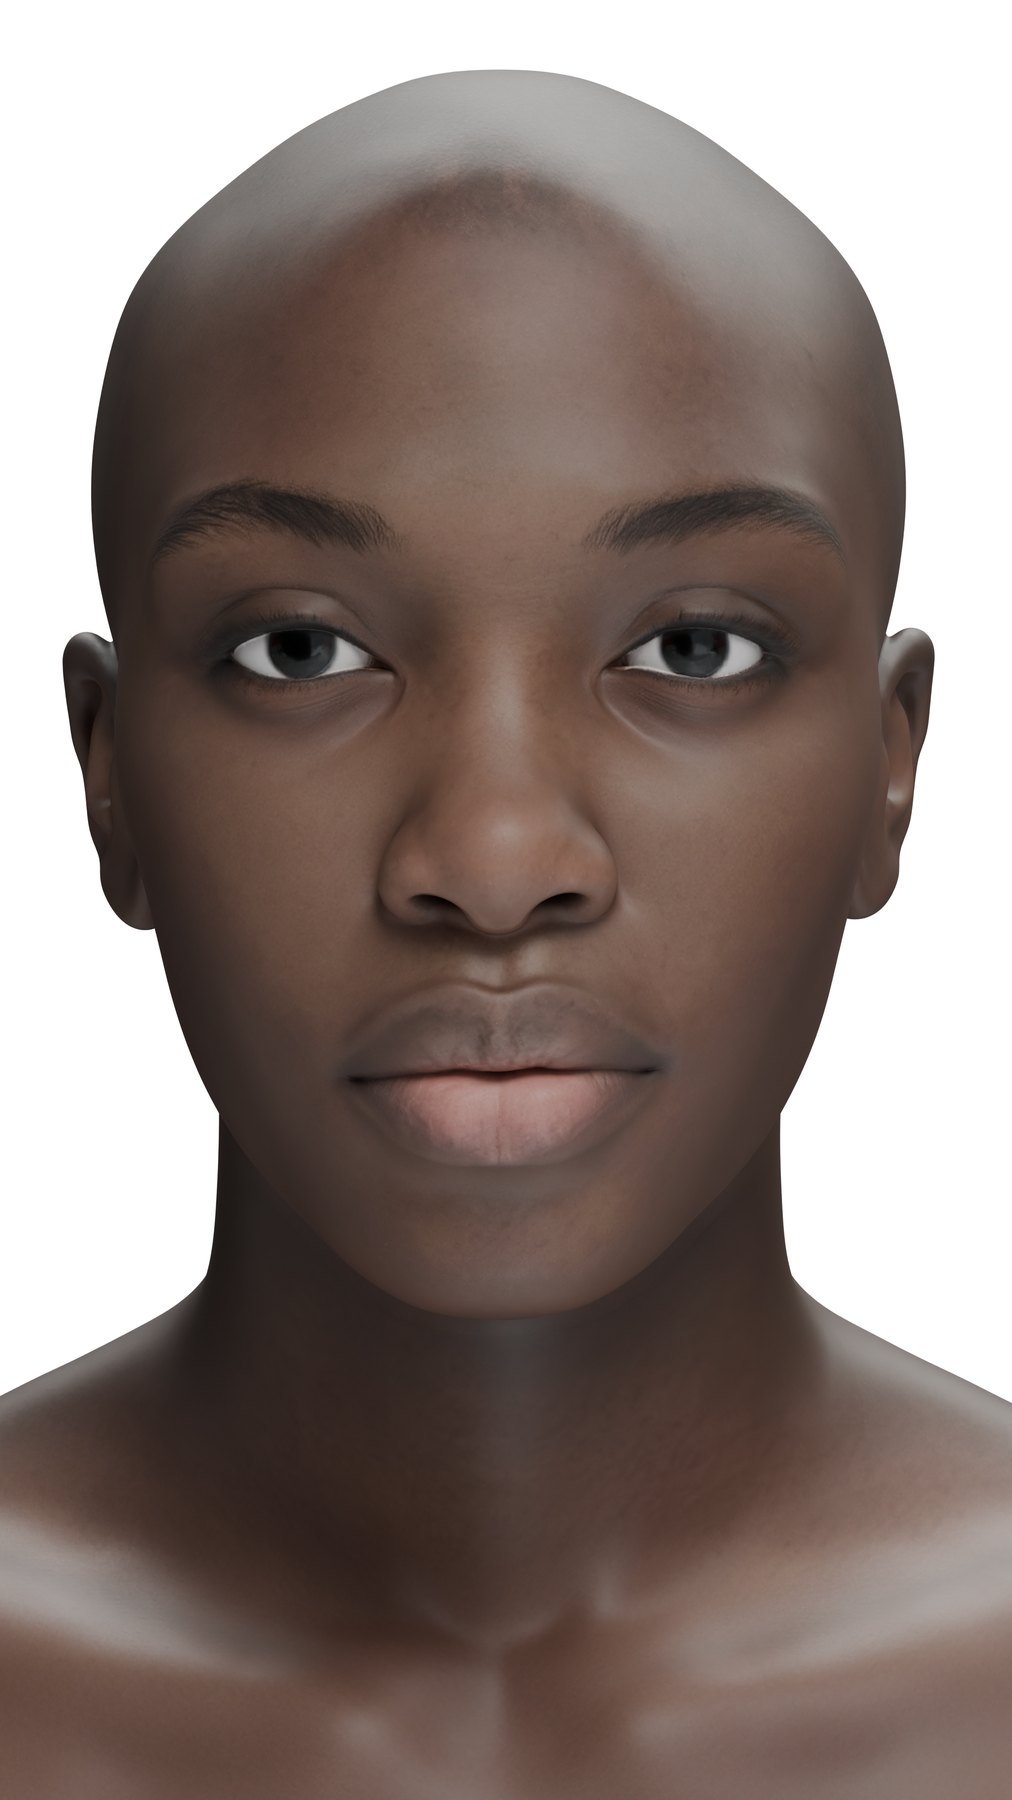
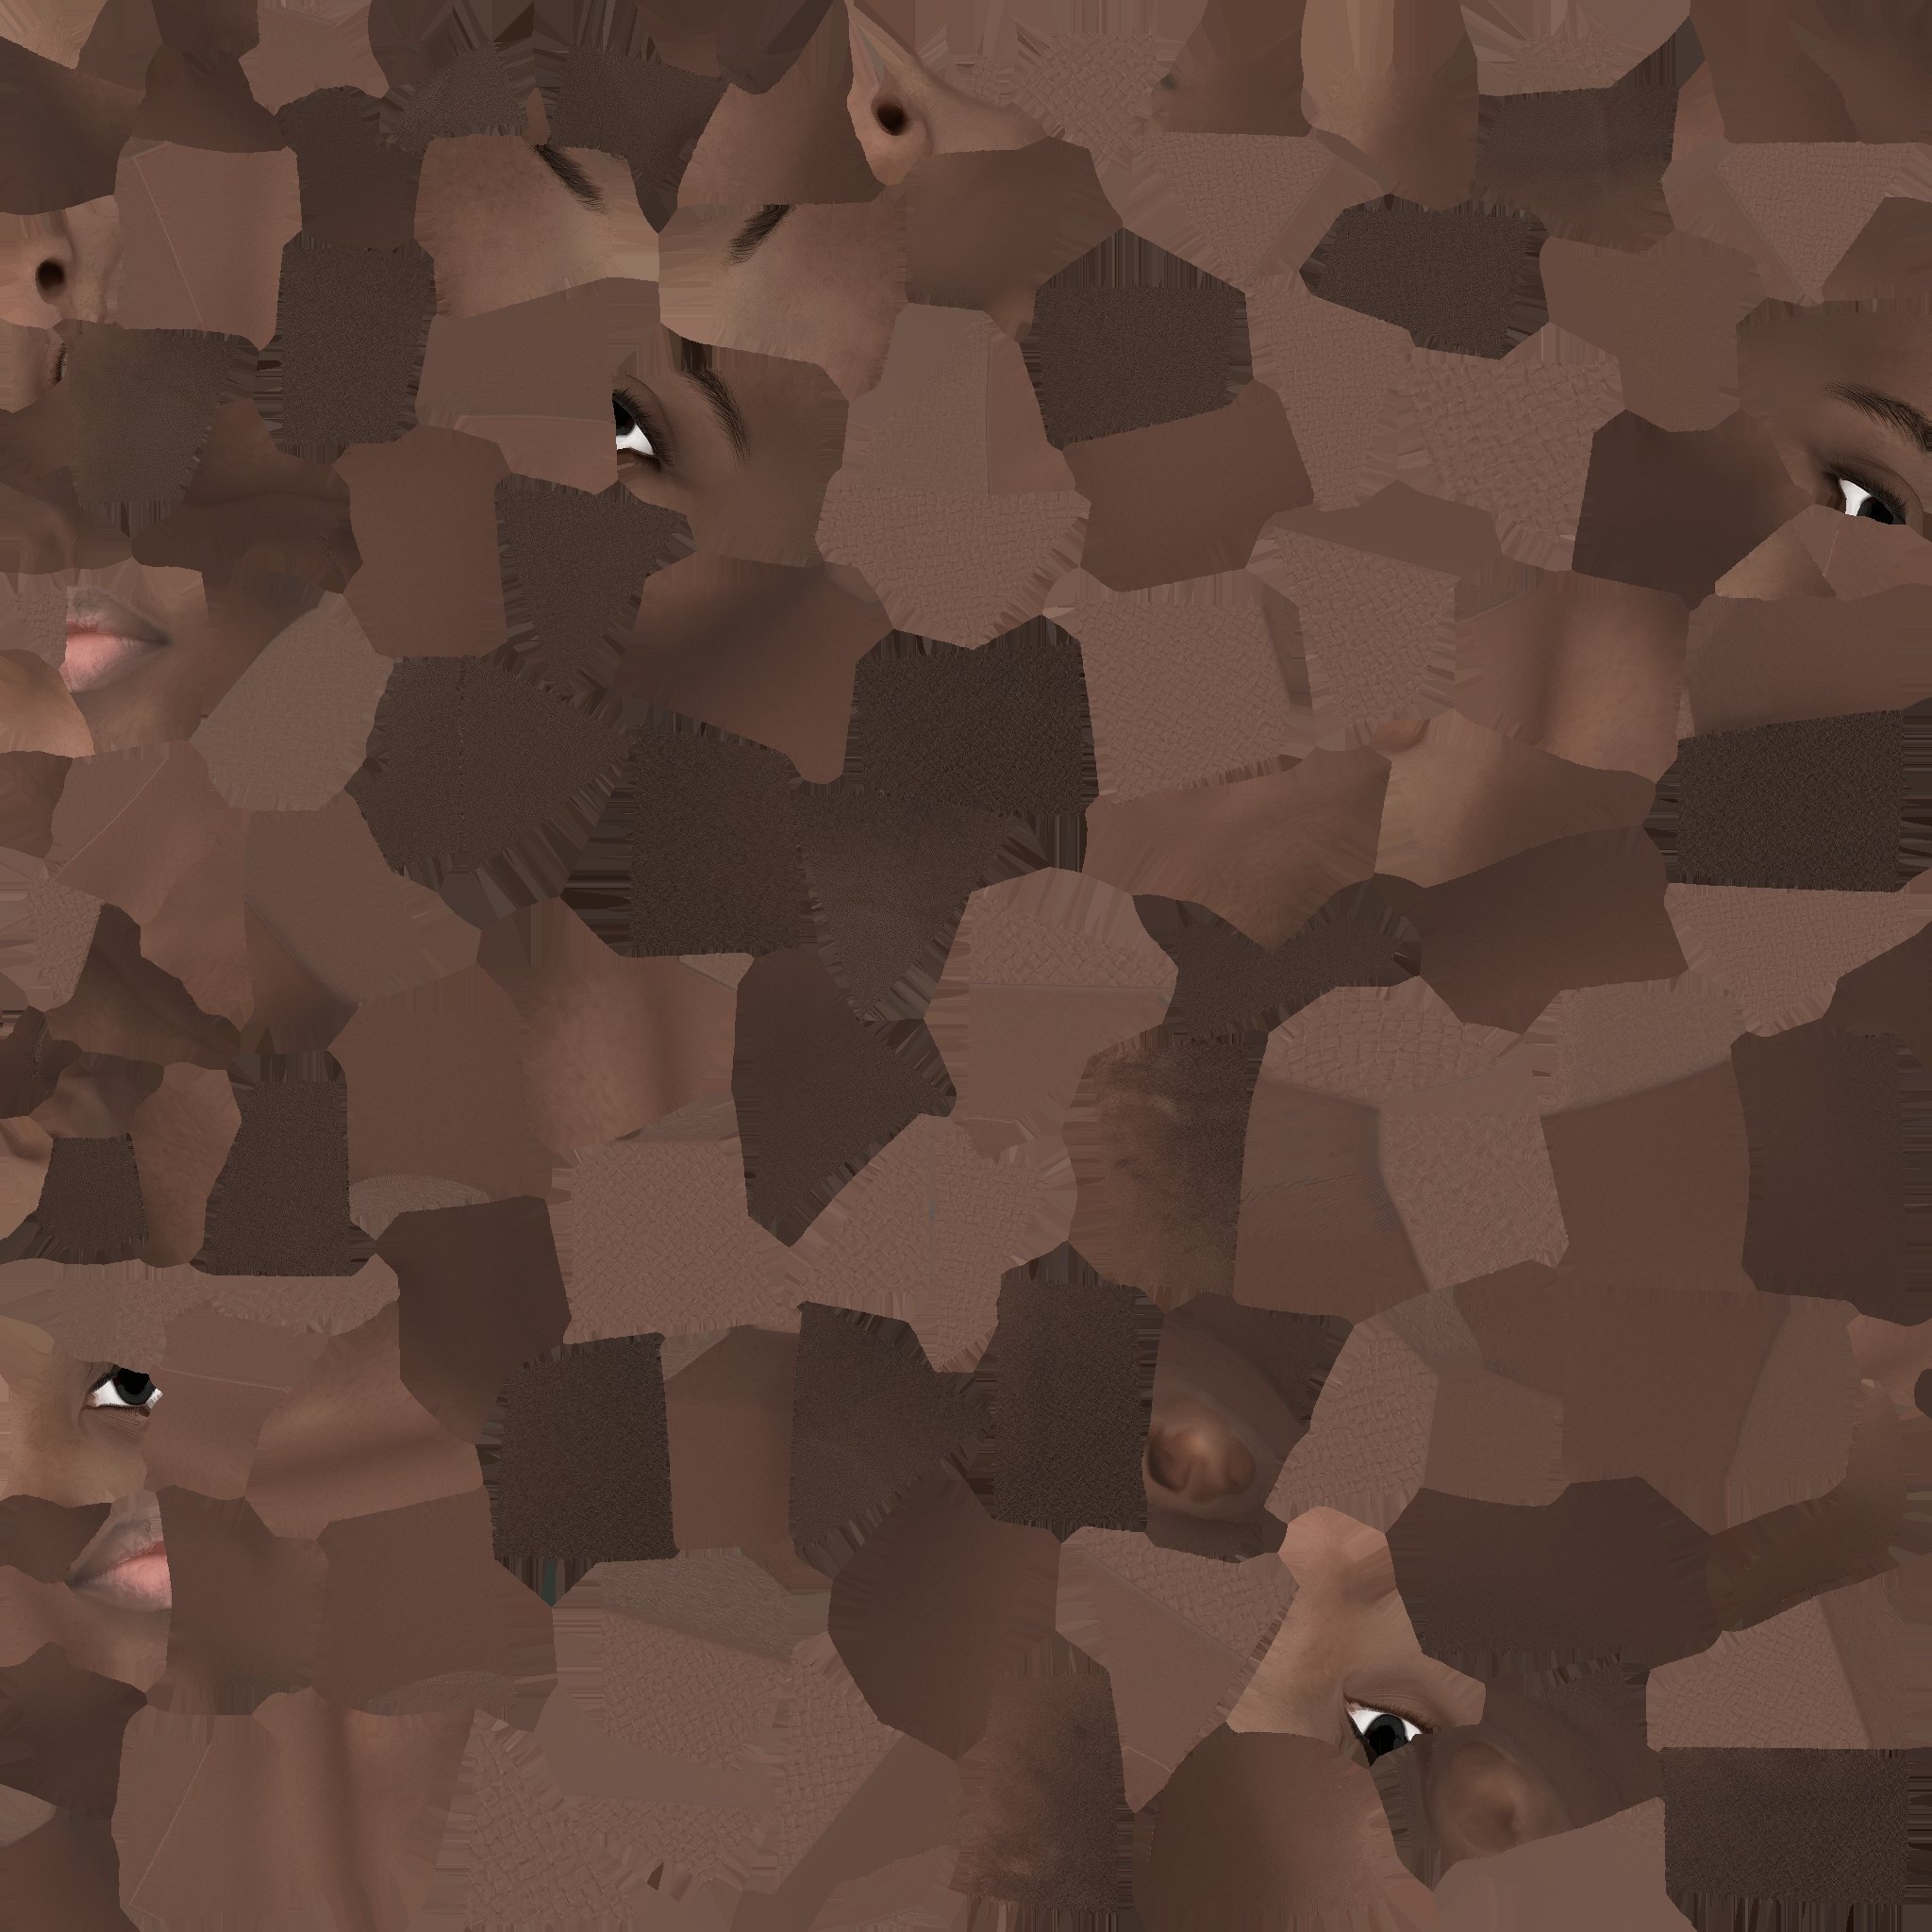
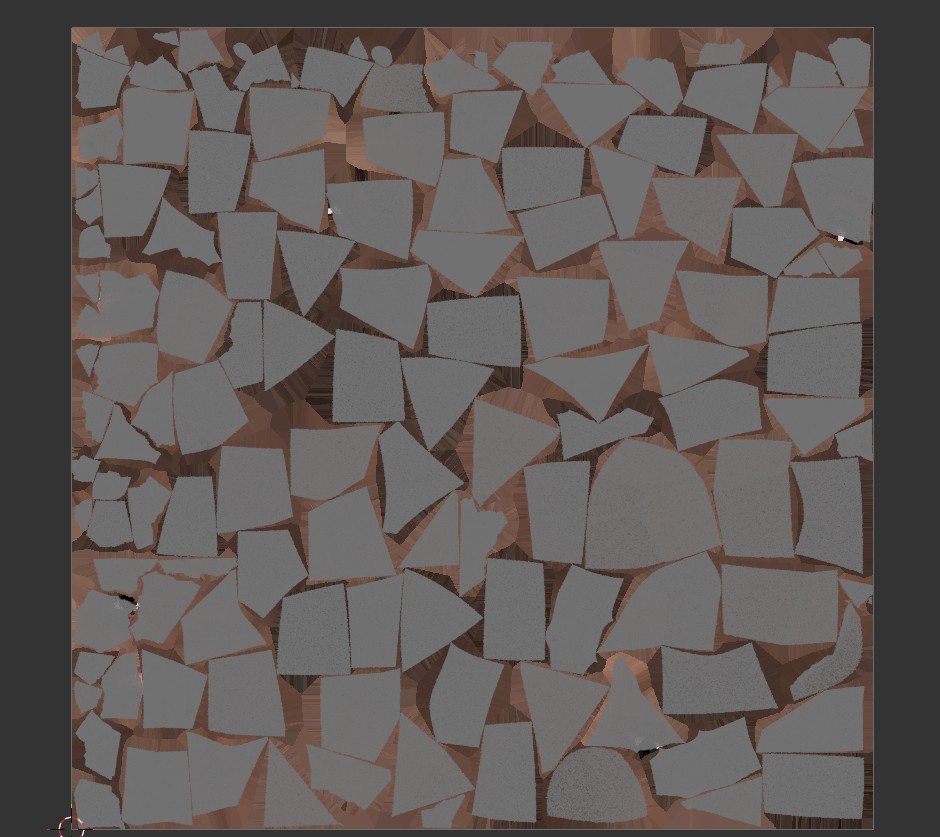
The wrapped template — your mesh, now carrying the target's shape.
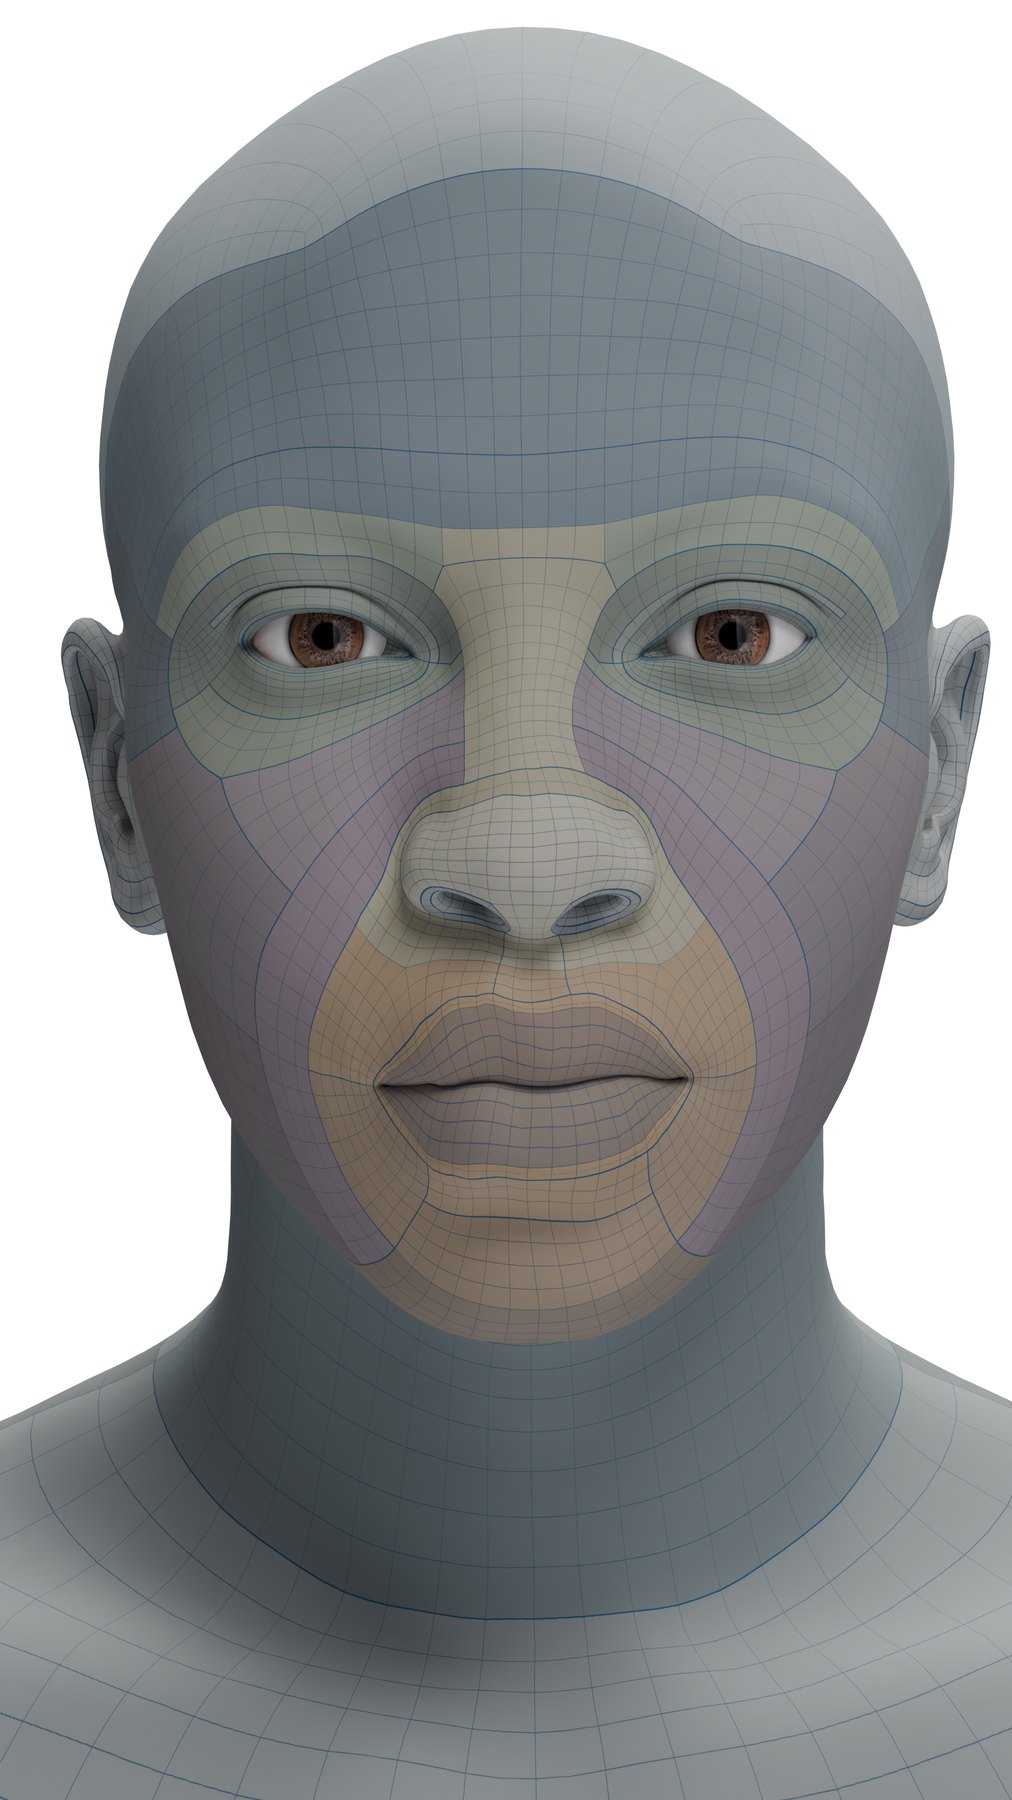
Left: the wrapped template with no material yet. Right: after Relocate Texture applies the transferred material.
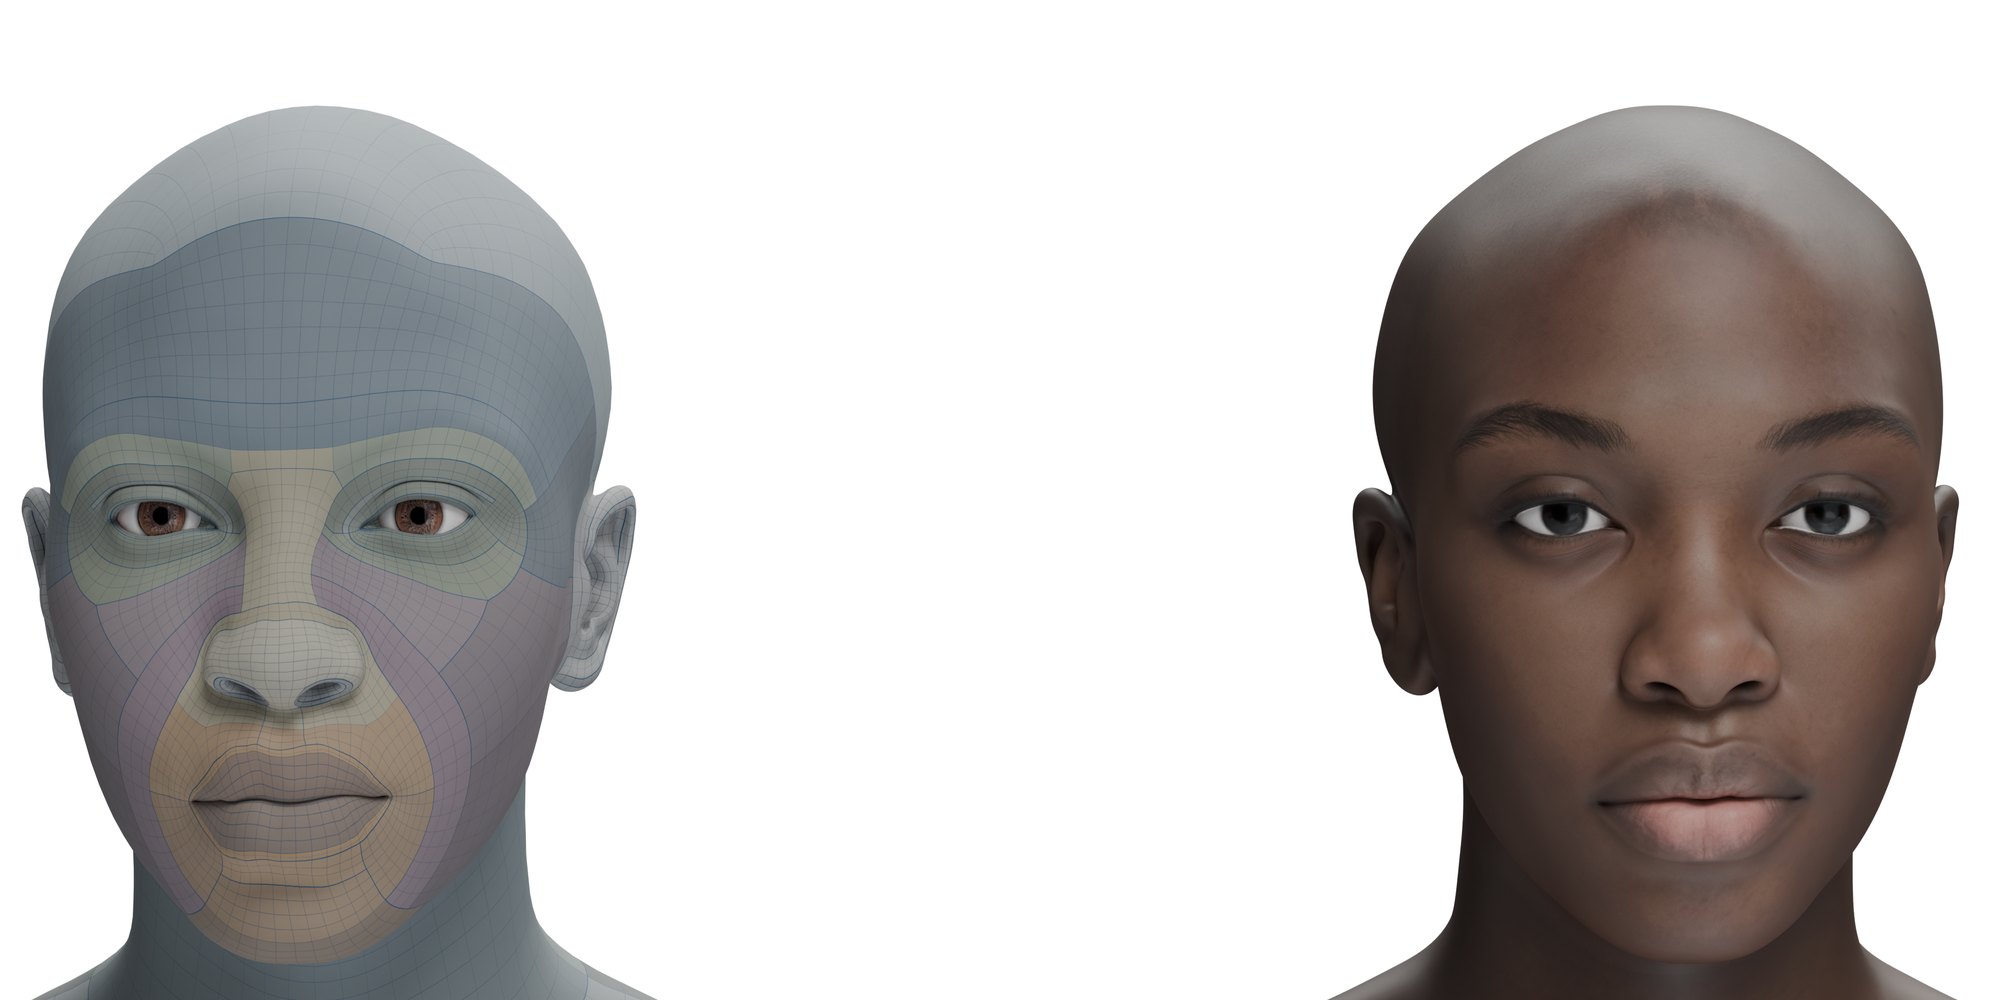
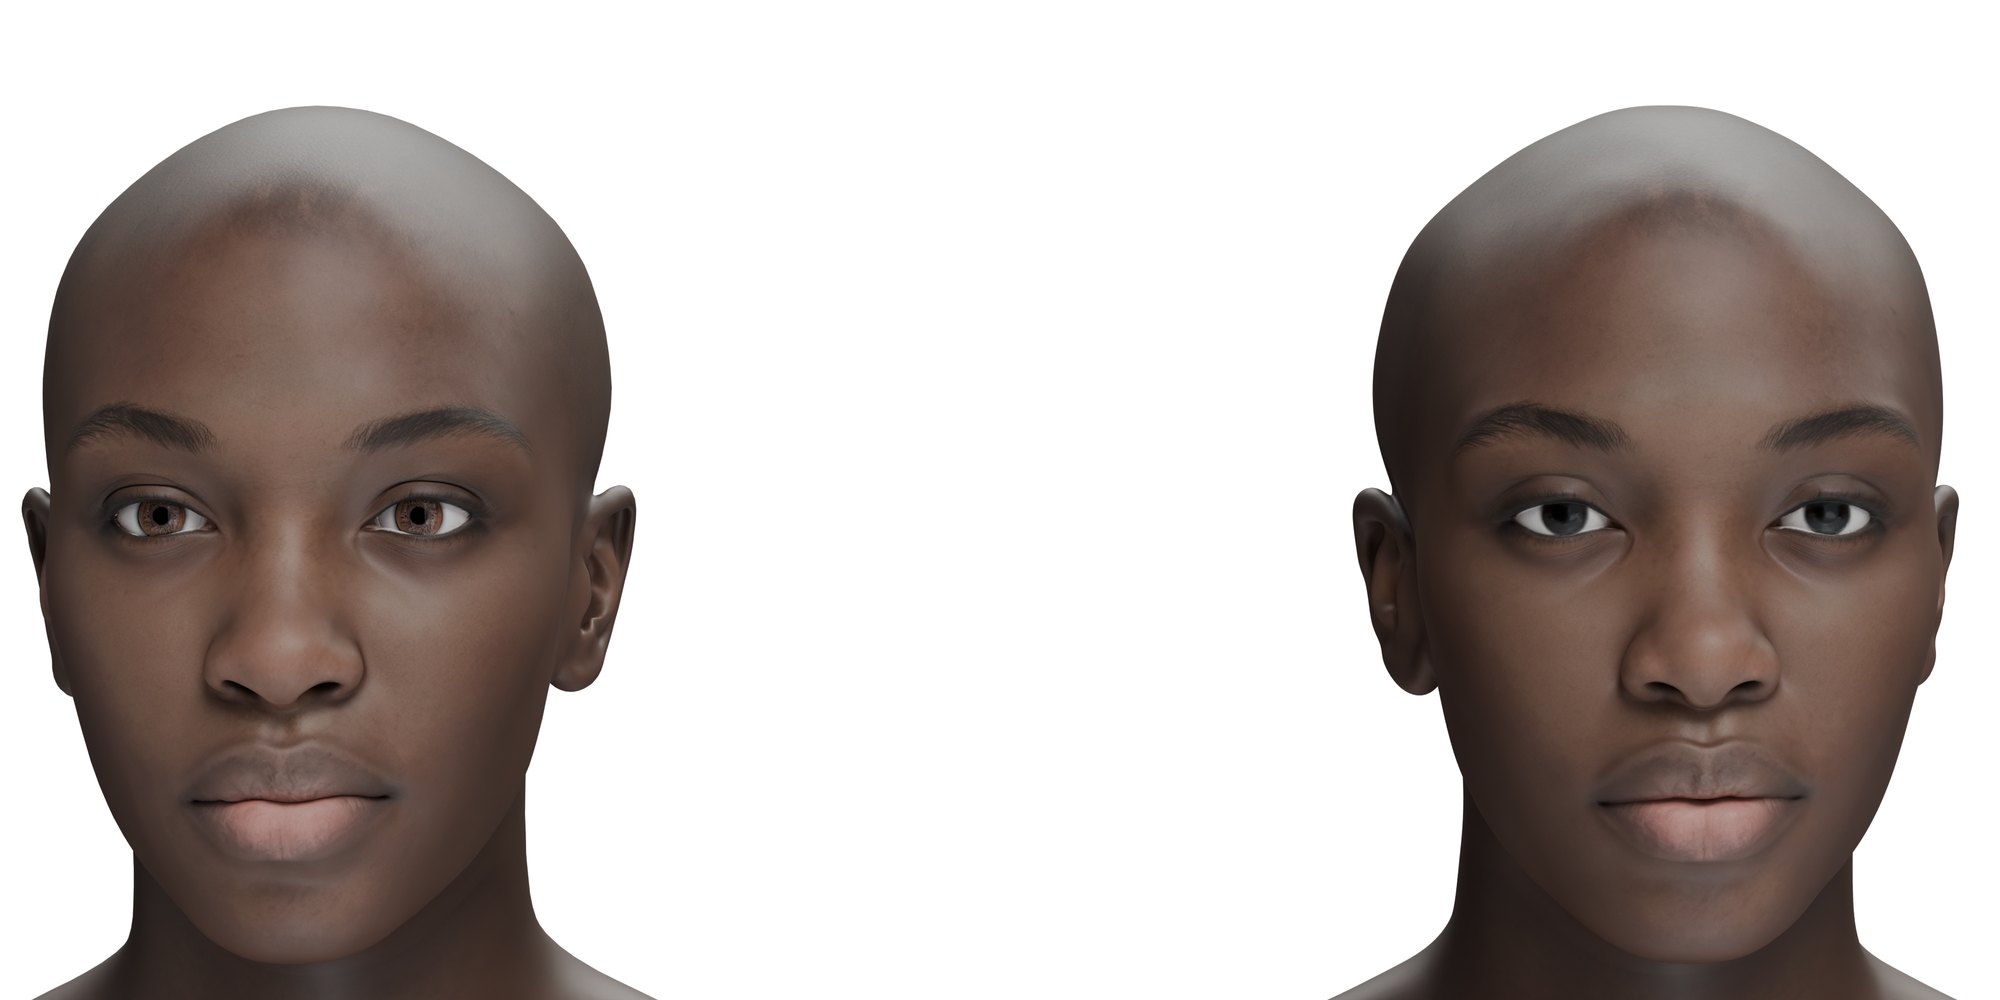
The relocated atlas — the source texture rebaked onto the template's UV layout.
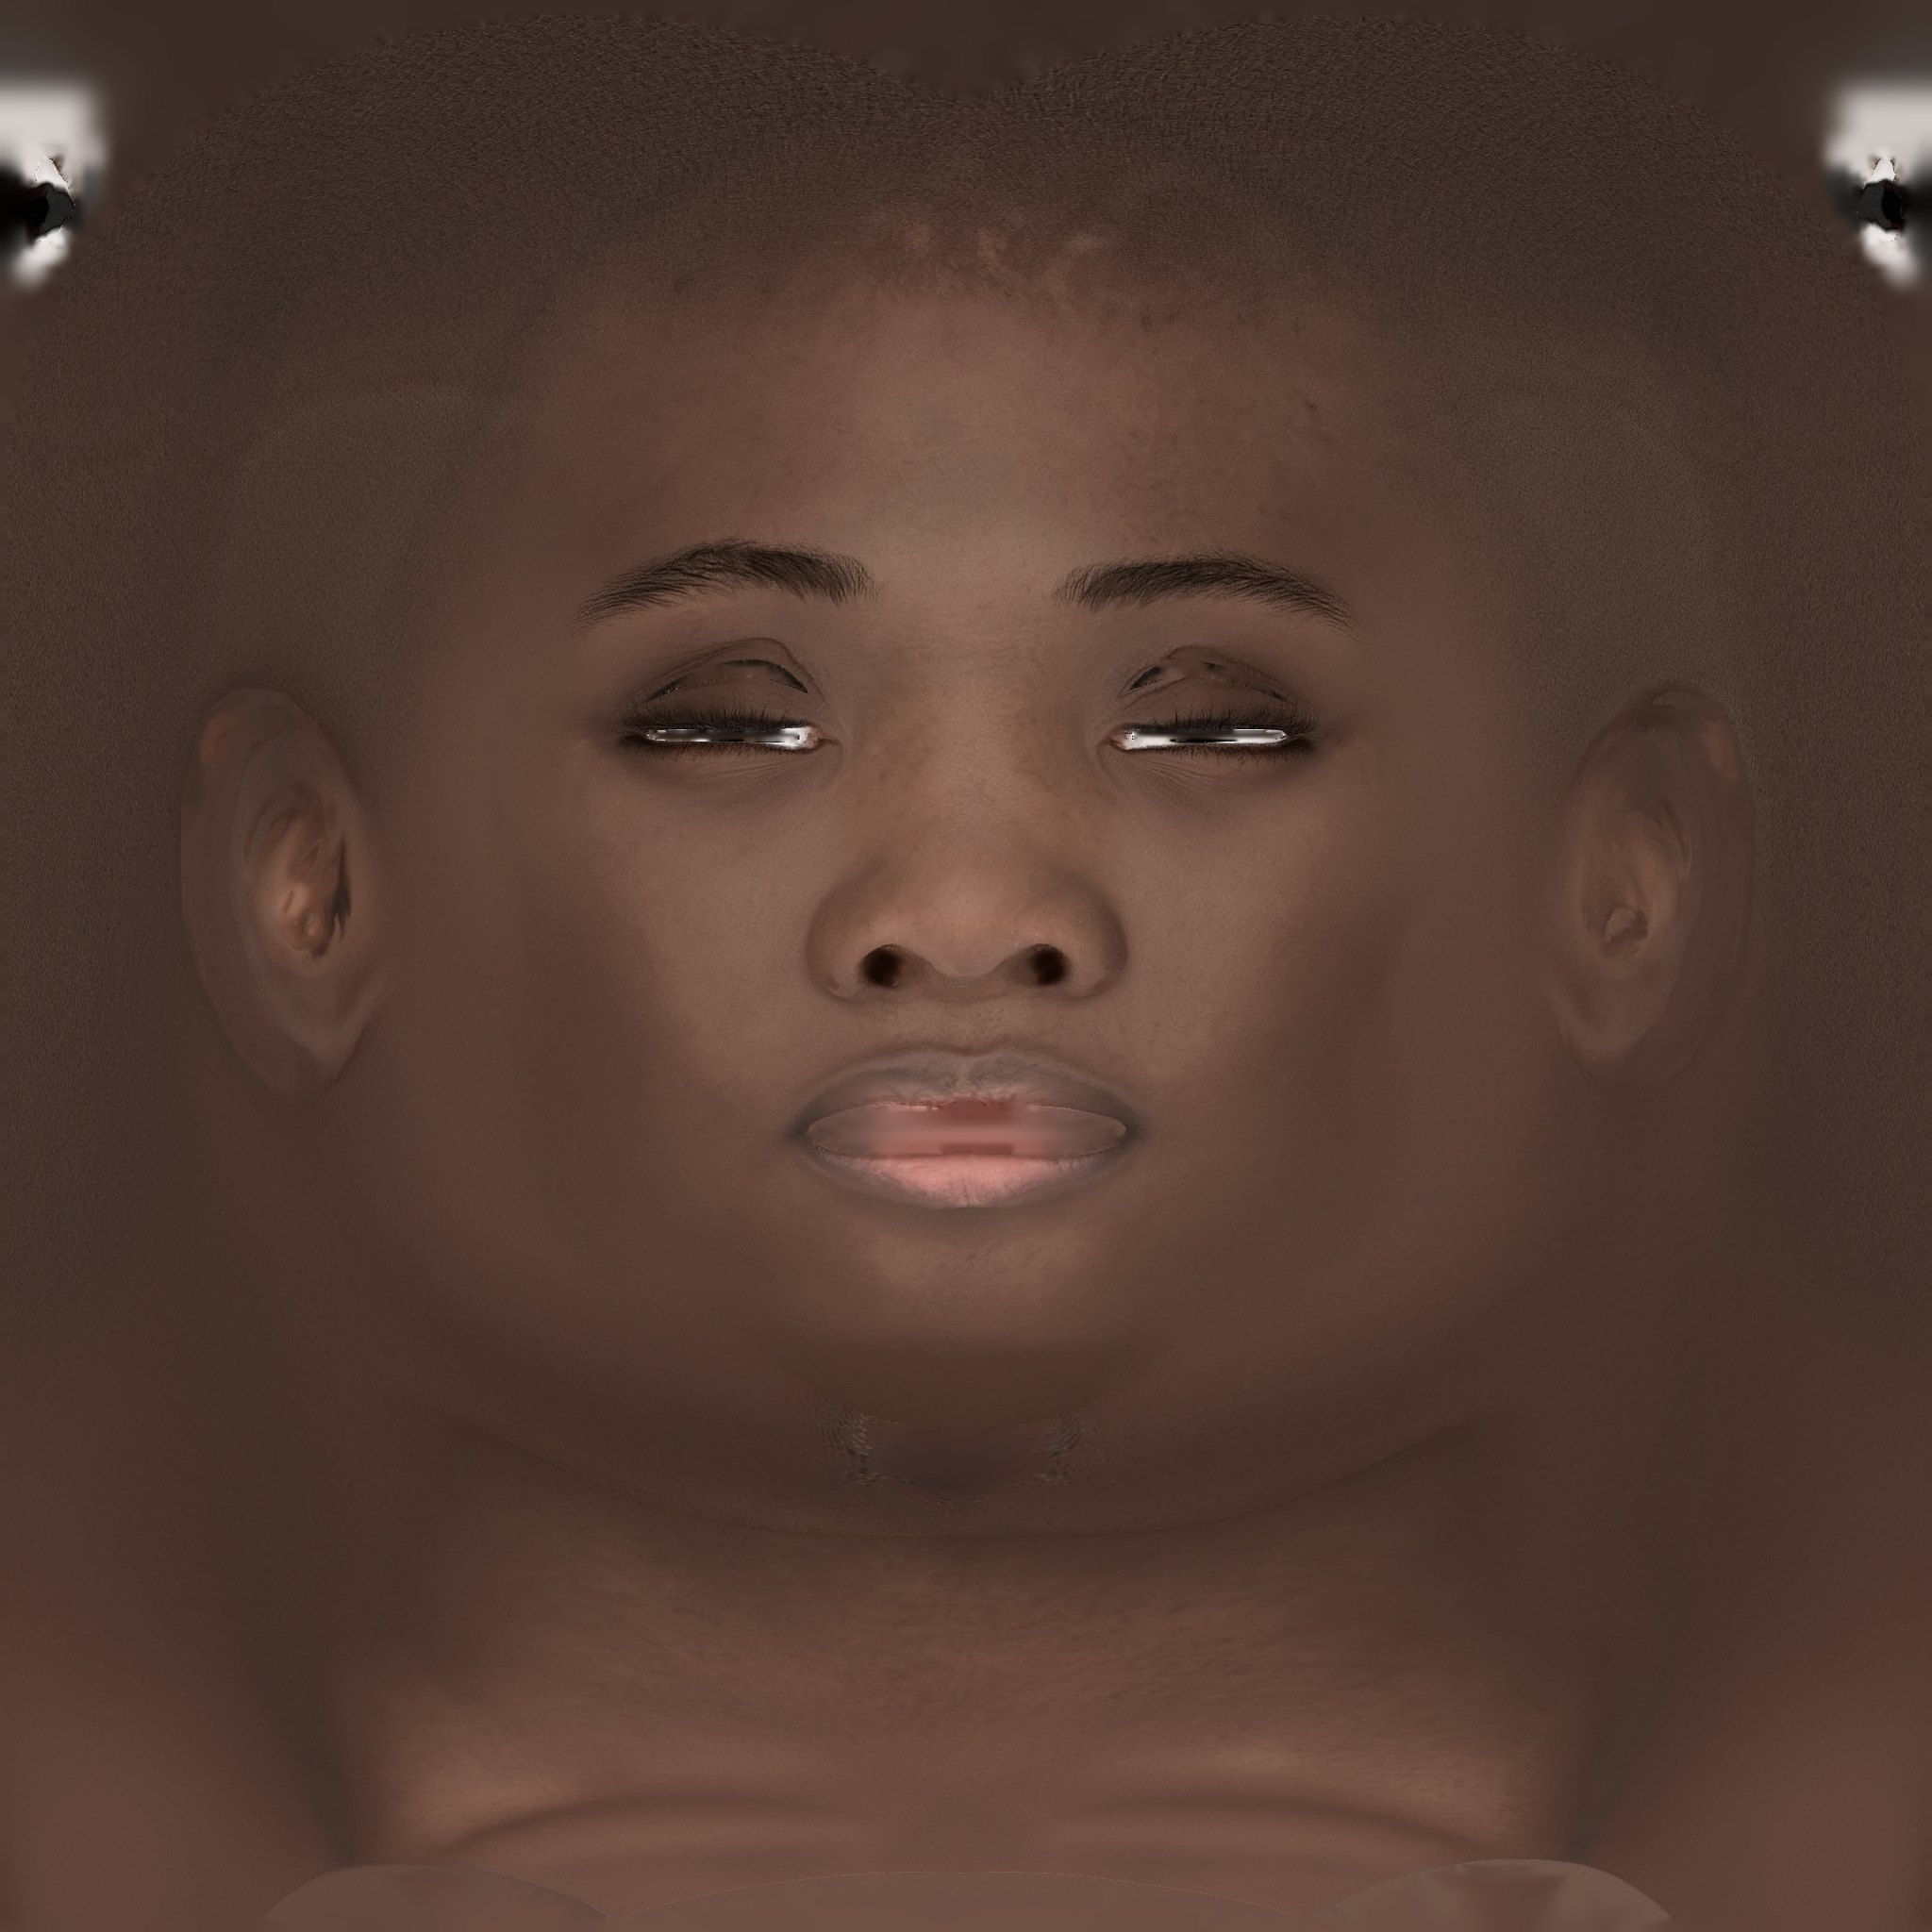
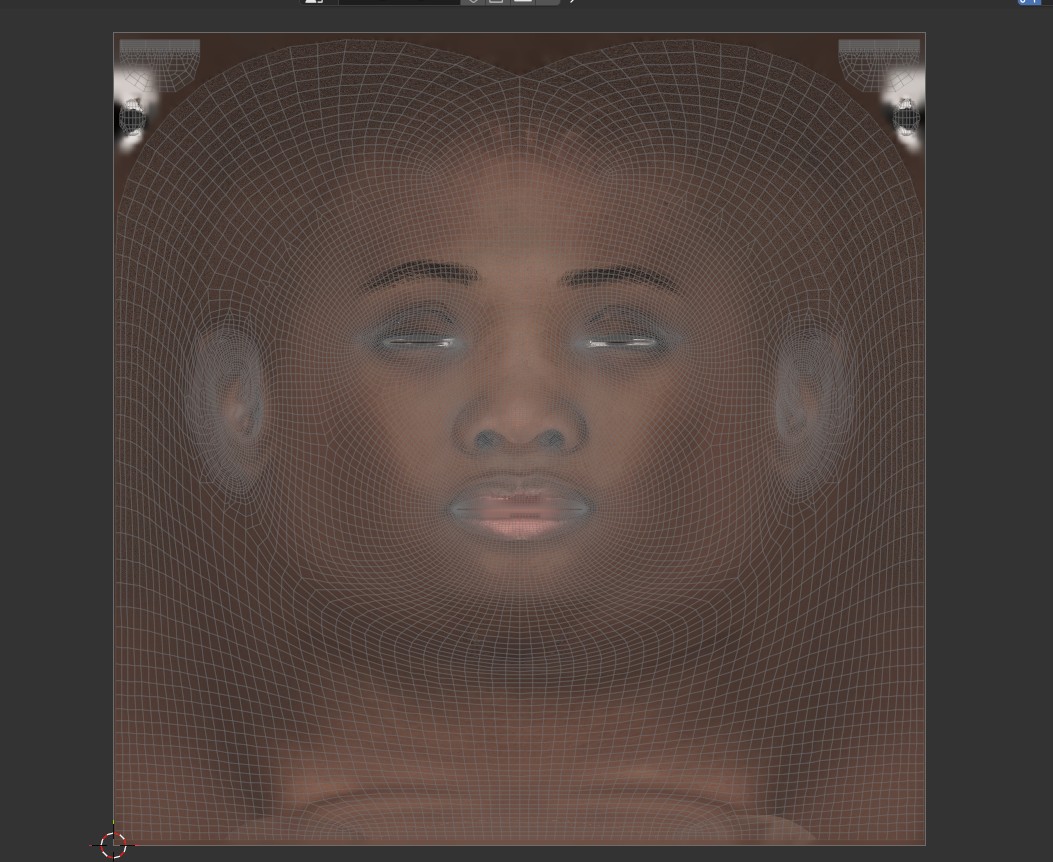
| Add image | Pick any image already loaded in the blend file, then press + to queue it. |
|---|---|
| Image list | The queue of source images. X removes the selected one; the trash clears the whole queue. |
| Raw / Final suffix | Defaults _raw and _final. Alex becomes Alex_raw (direct transfer) and Alex_final (after the fill). |
| Relocate | Runs the transfer for every queued image, in the background. |
| Status line | Reports progress and coverage. If it says 0 texels were covered, the template is not wrapped yet or its UVs sit outside the selected tile. |
Both meshes need a UV map for relocation. The add-on creates images only — it does not build or modify materials, so you stay in control of the shader.
Advanced → Transfer
| Atlas width / height | 0–16384, default 1024. Size of the image written into the template UVs. 0 on a side uses the source image's size. |
|---|---|
| UV tile U / V | 0–64, default 0. Which UDIM tile to read and write. Leave both at 0 for a normal single-tile atlas. |
| Projection | Bidirectional (default) is the right choice for a wrap. Closest point fills more texels but can smear across gaps. Normal then closest tries the ray first, then the nearest point. Topology is a fast path that only works when both meshes still share the same faces. |
| Filter | Bicubic (default) is the usual choice for photos. Bilinear is slightly sharper-free; Nearest keeps hard edges on masks and ID maps. |
| Limit distance / Max distance | Limit distance (on by default) rejects matches too far from the wrapped surface. Max distance 0 picks a sensible radius automatically — about two percent of the scan's size. |
| Min normal dot | -1–1, default 0. Rejects a match when the two surfaces face too far away from each other. 0 accepts every direction; raise toward 1 to keep only front-facing hits. |
| Closest-point fallback | Off by default. When the ray misses, grab the nearest scan point anyway. Leave it off for wraps — it can paint neck color onto the cheeks. |
| Sample linear | Off by default. Samples the scan image as linear light instead of sRGB — turn it on for data maps such as normal maps, not color photos. |
Advanced → Extrapolation
| Fill method | Push-pull (default) is a fast fill that covers the whole canvas. Frontier grows color outward from the covered edge — useful for controlled small gaps. |
|---|---|
| Fill iterations | 1–200, default 20. How many times the fill is allowed to grow. Raise it if islands still show empty rims. |
| Alpha threshold | 0–1, default 1.0. How opaque a texel must be to count as already filled. |
| Premultiply | Off by default. Multiply color by alpha before filling — enable only if the source was stored premultiplied. |
| Clamp | On by default. Keeps filled colors inside the 0–1 range — leave it on for standard 8-bit maps. |
| Drop alpha | On by default. Writes a fully opaque image after filling. Turn it off if you still need the coverage mask stored in alpha. |
Material Zones
Imported characters often split the body into named material zones — a figure brought in from Daz Studio, for example, arrives with slots like Head, Arms, Legs or Mouth Cavity. Material Zones reads those slots so you can pull regions out as their own objects, or turn them into vertex groups, without hunting for selection borders by hand. The section sits collapsed at the bottom of the panel; expand the triangle to use it.
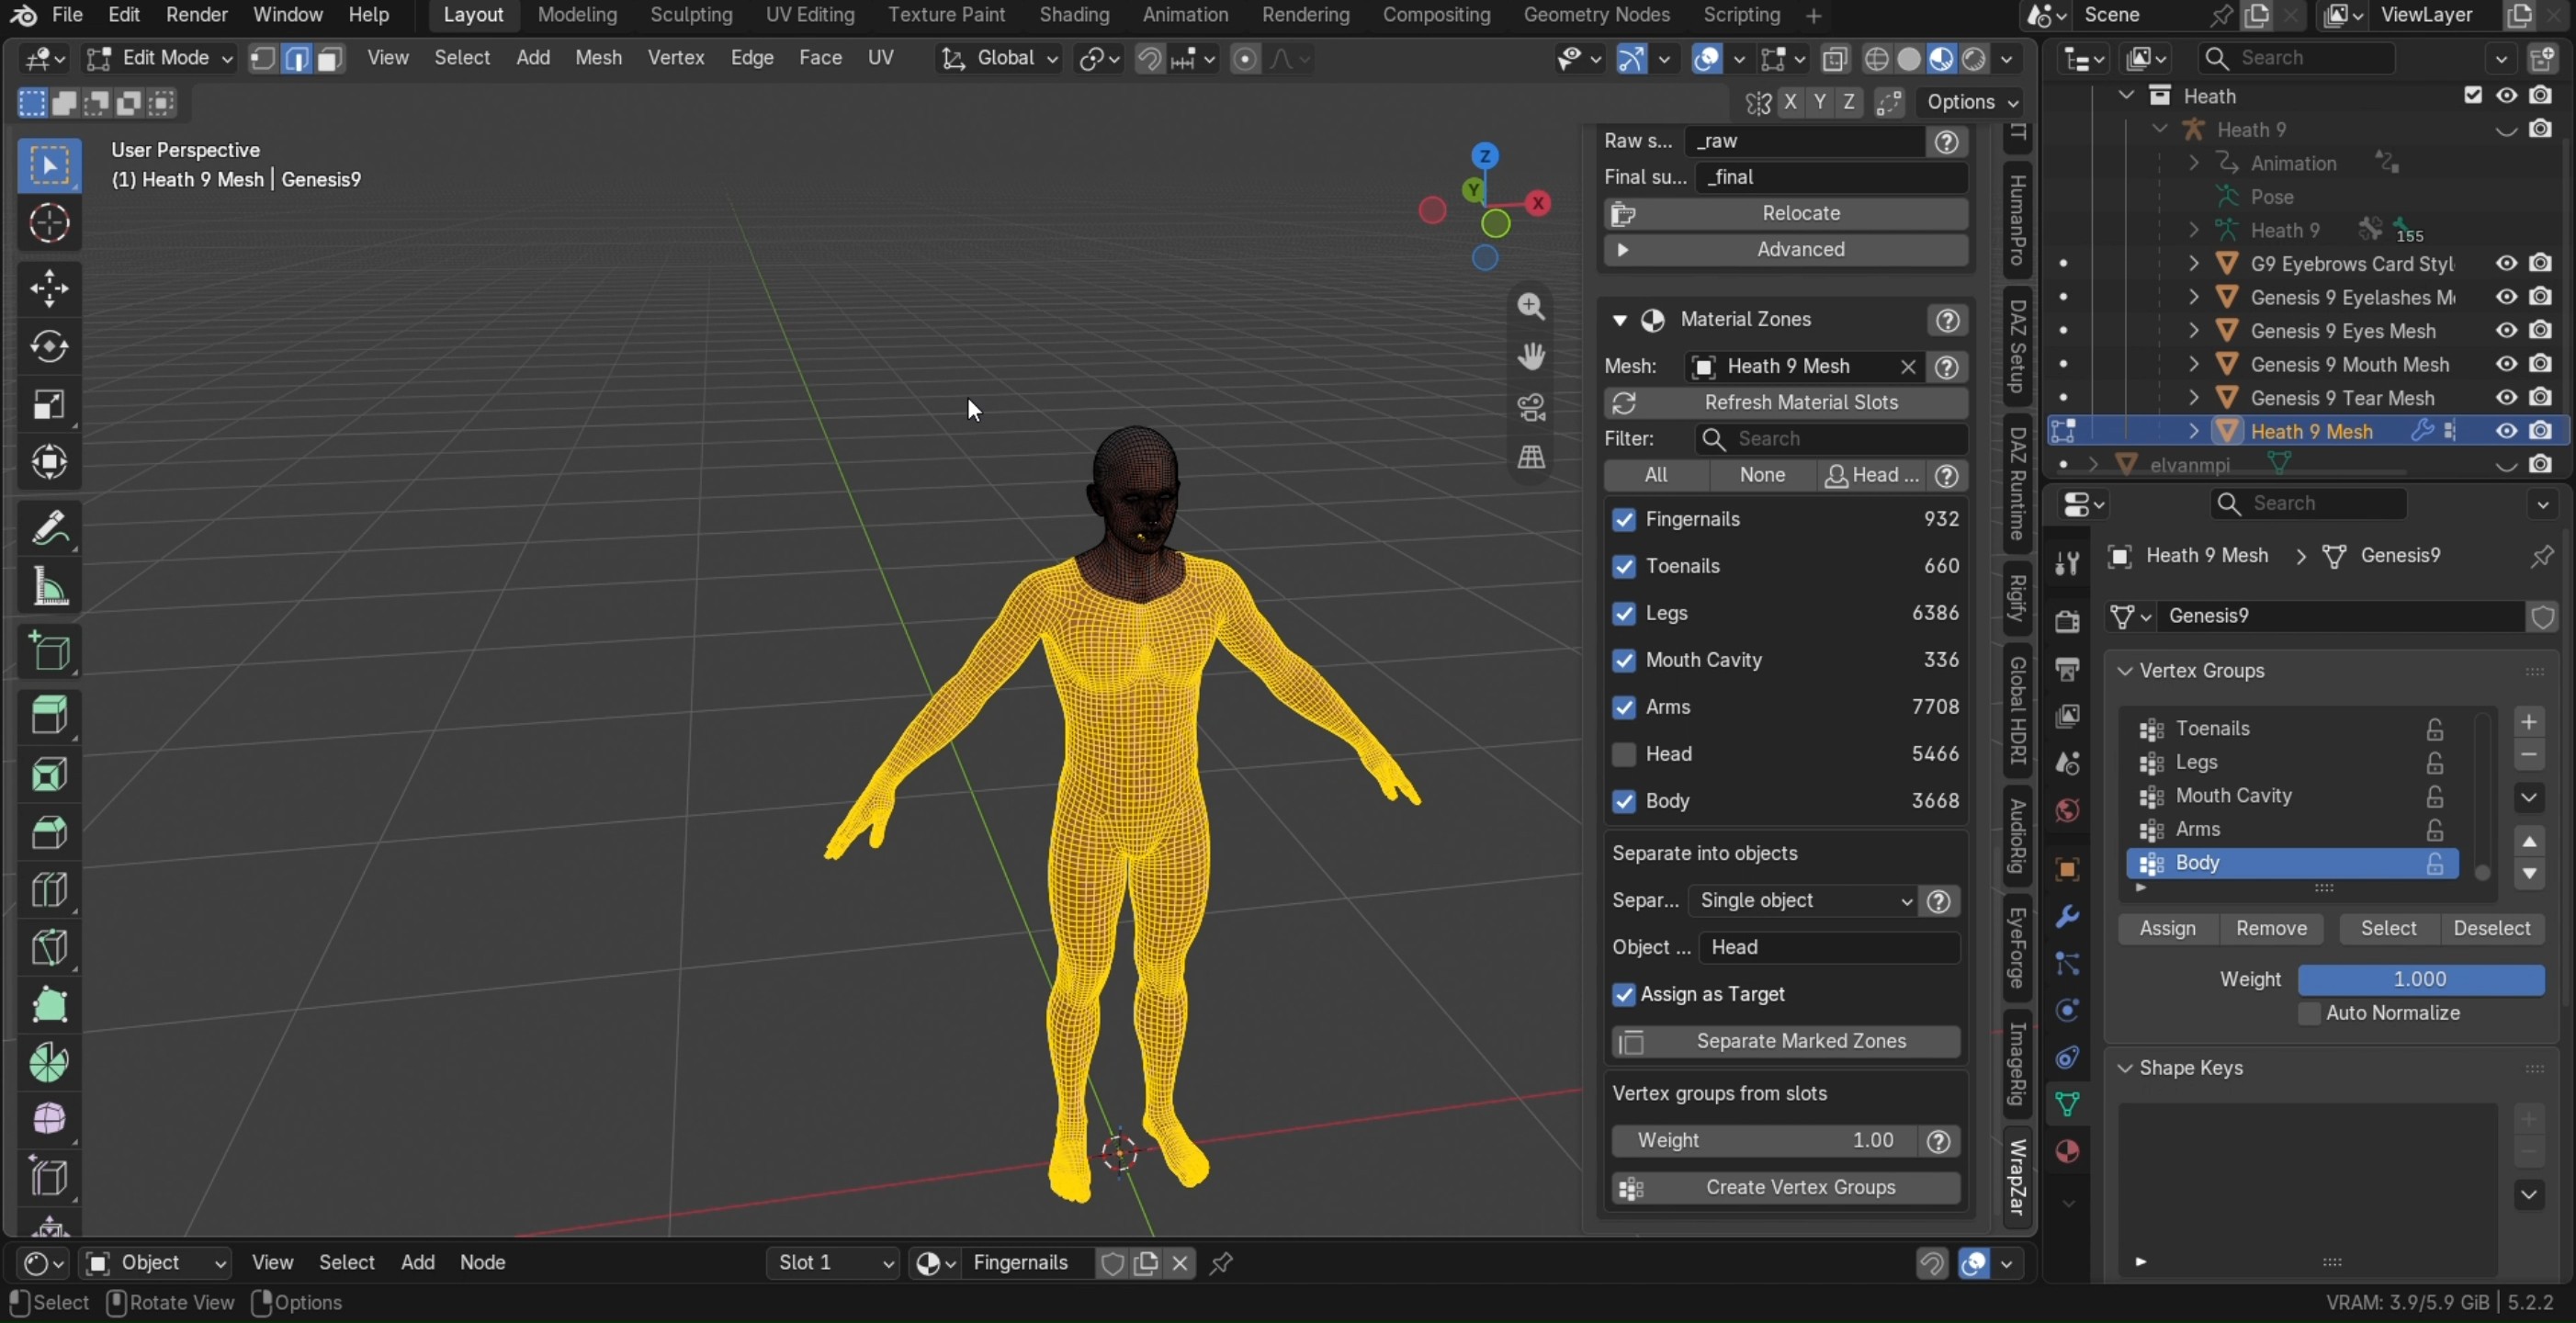
| Mesh | The mesh whose material slots are listed — usually the imported character you picked as Target. Setting a Target fills this field automatically when it is empty. |
|---|---|
| Refresh Material Slots | Reads the slot list again — use it after renaming or adding materials on the mesh. |
| Filter | Shows only the slots whose names contain the typed text — handy on characters with dozens of zones. |
| All / None | Marks or unmarks every listed slot at once. |
| Head zones | Marks every slot whose name looks like a head zone (Head, Face, Lips, Ears, EyeSocket, Mouth, Teeth, Tongue, Eyelashes, Cornea, Pupils, Iris, Sclera, Tearline, Scalp, Neck…). Slot names vary between exporters, so always review the list before running. |
| Slot list | One row per material slot, with its face count. Mark the zones you want to act on. |
Separate into objects
Moves the faces of every marked slot into new objects — the chosen mesh keeps whatever was not marked.
| Separate as | Single object (default) merges all marked zones into one mesh named below; One per material creates a separate object per zone, each named after its material. |
|---|---|
| Object name | Text, default Head. The name of the merged object — only used with Single object. |
| Assign as Target | On by default. Points the wrap at the first separated object, so a separated head is ready to wrap onto without another click. |
Vertex groups from slots
Creates one vertex group per marked slot — named exactly like the slot, filled with the chosen weight — without separating anything. Groups that already exist with those names are replaced. Run it on the template and the new groups feed Select Groups under Free Faces; on any mesh they are handy for masking, weight paint, or modifiers.
| Weight | 0–1, default 1.0. The weight written into each created vertex group. |
|---|
Typical Daz flow. Pick the imported figure as Target — Material Zones fills its mesh automatically — expand the section, press Head zones, review the marks, then Separate Marked Zones with Single object + Assign as Target: you get a head-only mesh that is already the wrap target. If the figure is your template instead, use Create Vertex Groups so zones like Mouth Cavity become selectable in Free Faces.
04 — Good to know
Honest notes for real jobs.
Results depend on your inputs. WrapZar does its best on human-like heads with clean templates and thoughtful pairs. Heavily stylized or hybrid creatures, scans with big missing regions, or templates whose proportions differ wildly from the target may never reach the shape you imagine — the wrap is a production starting point, not magic.
Flexible Shape Fit for non-human shapes. Creatures, caricatures and heads with parts that nearly touch wrap better with Flexible Shape Fit on — it relaxes shape preservation and stops nearby regions from pulling across empty space. Keep it off for ordinary human heads, where the stricter default gives cleaner results.
Free faces are your friend. Any template geometry that should ride along without being glued to the scan — mouth interior, eye cavities, inner ears — should be marked free before running, either by face selection or through matching vertex groups.
Density costs time. Processing speed depends mostly on the vertex count of the template and the target. If the scan is very heavy, decimating it first keeps the result essentially identical while making each run noticeably faster.
Apply your modifiers. No active modifiers are allowed on the template or the target — apply them all before you start. The add-on checks and tells you if one is still on.
UVs are only needed for textures. Wrapping works on any mesh; Relocate Texture needs a UV map on both the template (to write the new atlas) and the target (to read the source image).
05 — Troubleshooting
When something looks off.
| "… has topology modifiers" error | A modifier that changes geometry is still active. Apply all modifiers on that object. |
|---|---|
| Face looks good but the mouth interior exploded | The mouth bag was not marked free. Mark it under Free Faces and run again with Continue from last wrap off. |
| Exaggerated features stay rounded and never reach the scan | Shape preservation is holding the template too rigidly. Turn Flexible Shape Fit on (GraphWrap). |
| A part bends toward another part it only passes near | Nearby but disconnected geometry is pulling across empty space. Turn Flexible Shape Fit on so influences follow the surface. |
| A region ignores the pairs you placed | Raise Pair weight (L-ICP) or the spline weight, and check the pairs are enabled in the list. |
| Relocate reports 0 covered texels | The template has not been wrapped yet, or its UVs sit outside the selected UV tile. Wrap first, then relocate. |
| Transferred texture looks smeared toward the neck or ears | Turn Closest-point fallback off and keep Limit distance on; then let the fill step cover the remaining holes. |
| Imported pairs do nothing | The mesh topology changed since the pairs were exported — pair lists are only valid for the same face layout. |
06 — A note on timing
Transparency first. Only yesterday did I learn that another creator released a similar Blender add-on about two weeks before this one. The resemblance is easy to explain and worth stating openly: the algorithms behind this kind of tool — ICP registration, deformation models, non-rigid wrapping — are publicly published in academic papers and open-source projects such as Meshmonk or the probreg collection. Anyone building from those same public foundations will naturally arrive at a similar feature set.
The two projects still differ, both in price and in workflow, and each reflects its author's own pipeline and priorities.
This note is simply to make clear that the timing is pure coincidence: the add-on released some fifteen days ago and WrapZar, released today — September 24, 2026 — were developed independently. WrapZar has been in development since the second week of August 2026.
WrapZar — topology-preserving head wrapping for Blender.